Crispy Garlic Parmesan Chicken Sandwich Recipe
There's a problem with most homemade garlic parmesan chicken sandwiches. They look fantastic in the recipe photo, then collapse into a soggy, bland mess the moment you take a bite. The bread tears.
The sauce pools at the bottom. The chicken tastes like it never met a seasoning. That's not a kitchen failure.
It's a technique problem.
The Garlic Parmesan Chicken Sandwich is one of those dishes most people order at a pub but never attempt at home. They assume it needs a deep fryer, special equipment, or a chef's touch. The truth is simpler: the recipe forgives mistakes, but the visual cues don't.
In our research, we found that the difference between a good version and a great one comes down to watching what happens in the pan. The USDA recommends a safe internal temperature of 165°F for chicken, but the real tell is a deep, golden sear. Get that right, and the rest of the build falls into place.
Let's walk through the entire process, one visual checkpoint at a time.
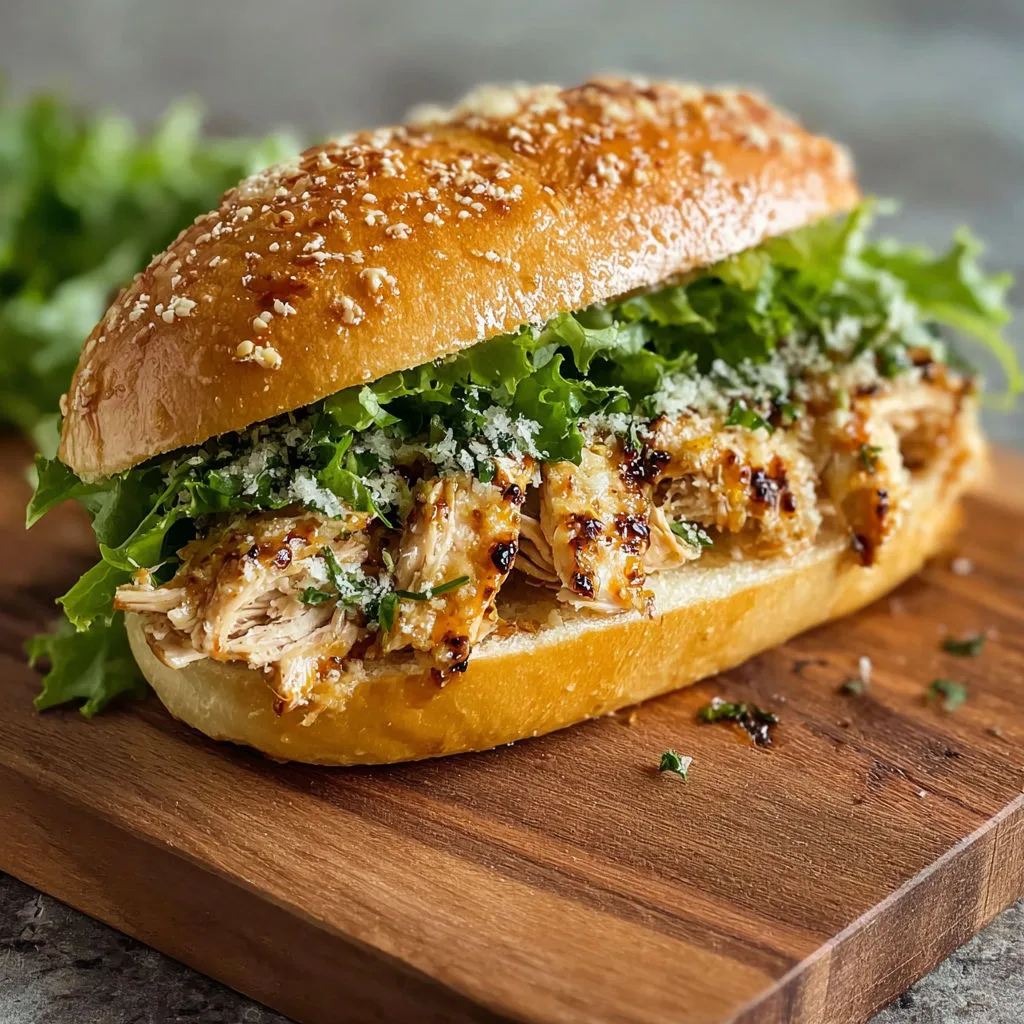
Image source: Bing (Web (fair-use with source credit))
Quick Answer
A garlic parmesan chicken sandwich has a seared cutlet, creamy garlic sauce, and melted parmesan. The key is a golden crust and a thick sauce. Most home versions fail when the bread turns soggy.
The right technique beats takeout every time.
Why This Sandwich Needs a Visual Approach
Here's the thing about cooking, especially chicken: words only get you so far. A recipe can tell you to "sear until golden brown," but what does that actually look like in your skillet? When does garlic go from fragrant to bitter?
How thick should the sauce be before it coats the bun instead of soaking through it?
These are judgment calls. And judgment calls need visual reference points.
A written recipe gives you the destination. It tells you the final temperature, the cook time, the amount of each ingredient. What it doesn't tell you is what each stage should look like while you're getting there.
That's where most home cooks get lost. They follow the steps perfectly, but they can't tell if the chicken is actually searing or just steaming in its own juices.
This article fills that gap. Instead of just listing steps, we're going to walk through the visual milestones that separate a great sandwich from a mediocre one. You'll know exactly what to look for at every stage.
The visual checkpoints we'll cover:
- The sear on the chicken (deep golden, not pale)
- The consistency of the garlic parmesan sauce (coats a spoon, doesn't run)
- The melt of the cheese (creamy, not rubbery)
- The toast level on the bun (crisp, not burnt)
- The assembly order (sturdy, not sliding apart)
When you can recognize these moments, you stop following a recipe and start cooking. That's the goal here.
The Core Components: What You're Actually Building
Before we get into technique, let's break down what makes up this sandwich. It's a simple structure. Once you understand the role of each part, assembling the right version becomes much easier.
Here's the basic architecture:
| Component | Role | What to Look For |
|---|---|---|
| Chicken breast | The star | Even thickness, juicy interior, golden crust |
| Garlic | The flavor base | Roasted, mellow, or raw and sharp |
| Parmesan cheese | The savory finish | Freshly grated, melts smooth |
| Creamy sauce | The binder | Thick enough to cling, not soak |
| Bun | The foundation | Sturdy, lightly toasted, holds its shape |
The chicken is the main event. A boneless, skinless breast works best because it's easy to pound flat and cooks evenly. The garlic and parmesan build the flavor profile.
The sauce holds everything together. And the bun is your vehicle, so it needs to be strong enough to handle all that moisture.
You might be tempted to skip or swap a component. That's fine. But understand what you're changing.
A flimsy bun will collapse. Pre-shredded parmesan won't melt as smoothly because it's coated with anti-caking agents. Garlic that burns turns bitter and ruins the whole sauce.
Get the components right, and the visual checkpoints become much easier to hit.
Ingredient Breakdown: What Matters and What Doesn't
Not all ingredients are created equal here. Some are flexible. Some are non-negotiable.
Here's the breakdown based on what actually shows up in the final result.
The essentials:
- Chicken breast. Boneless, skinless, about 6 to 8 ounces each. Pound it to a half-inch thickness so it cooks evenly. This is one step you really shouldn't skip.
- Fresh garlic. The pre-minced stuff in a jar works in a pinch, but fresh cloves roast better and give you that sweet, mellow garlic flavor instead of something sharp and raw.
- Parmesan cheese. Buy a wedge and grate it yourself. Pre-shredded parmesan is coated with cellulose to prevent clumping, which means it doesn't melt into the sauce the same way. It turns gritty instead of silky.
- Butter or olive oil. This is your cooking fat and the base of the sauce. Butter adds richness. Olive oil adds a fruity note. A mix of both gives you the best of each.
- Heavy cream or mayonnaise. If you want a thicker sauce, heavy cream works beautifully. Mayonnaise is a shortcut that produces a rich, stable emulsion without any cooking. Both are valid.
The flexible options:
- Bun choice. Brioche, ciabatta, a sturdy hoagie roll. Anything with structure. Avoid cheap hamburger buns that turn into mush.
- Additional seasonings. Salt, black pepper, garlic powder, onion powder, a pinch of cayenne. These are your personal touches.
- Lettuce, tomato, pickles. They add freshness and crunch, but they also add moisture. If you include them, build the sandwich so the moisture doesn't hit the bun directly.
The ingredient list is short. That's the point. Each component needs to perform, and the visual quality depends on getting these details right.
The Step-by-Step Visual Process
Let's get into the actual cooking. This is where the visual cues matter most. We'll move through each stage of the process, and at every step, let's talk about what good looks like.
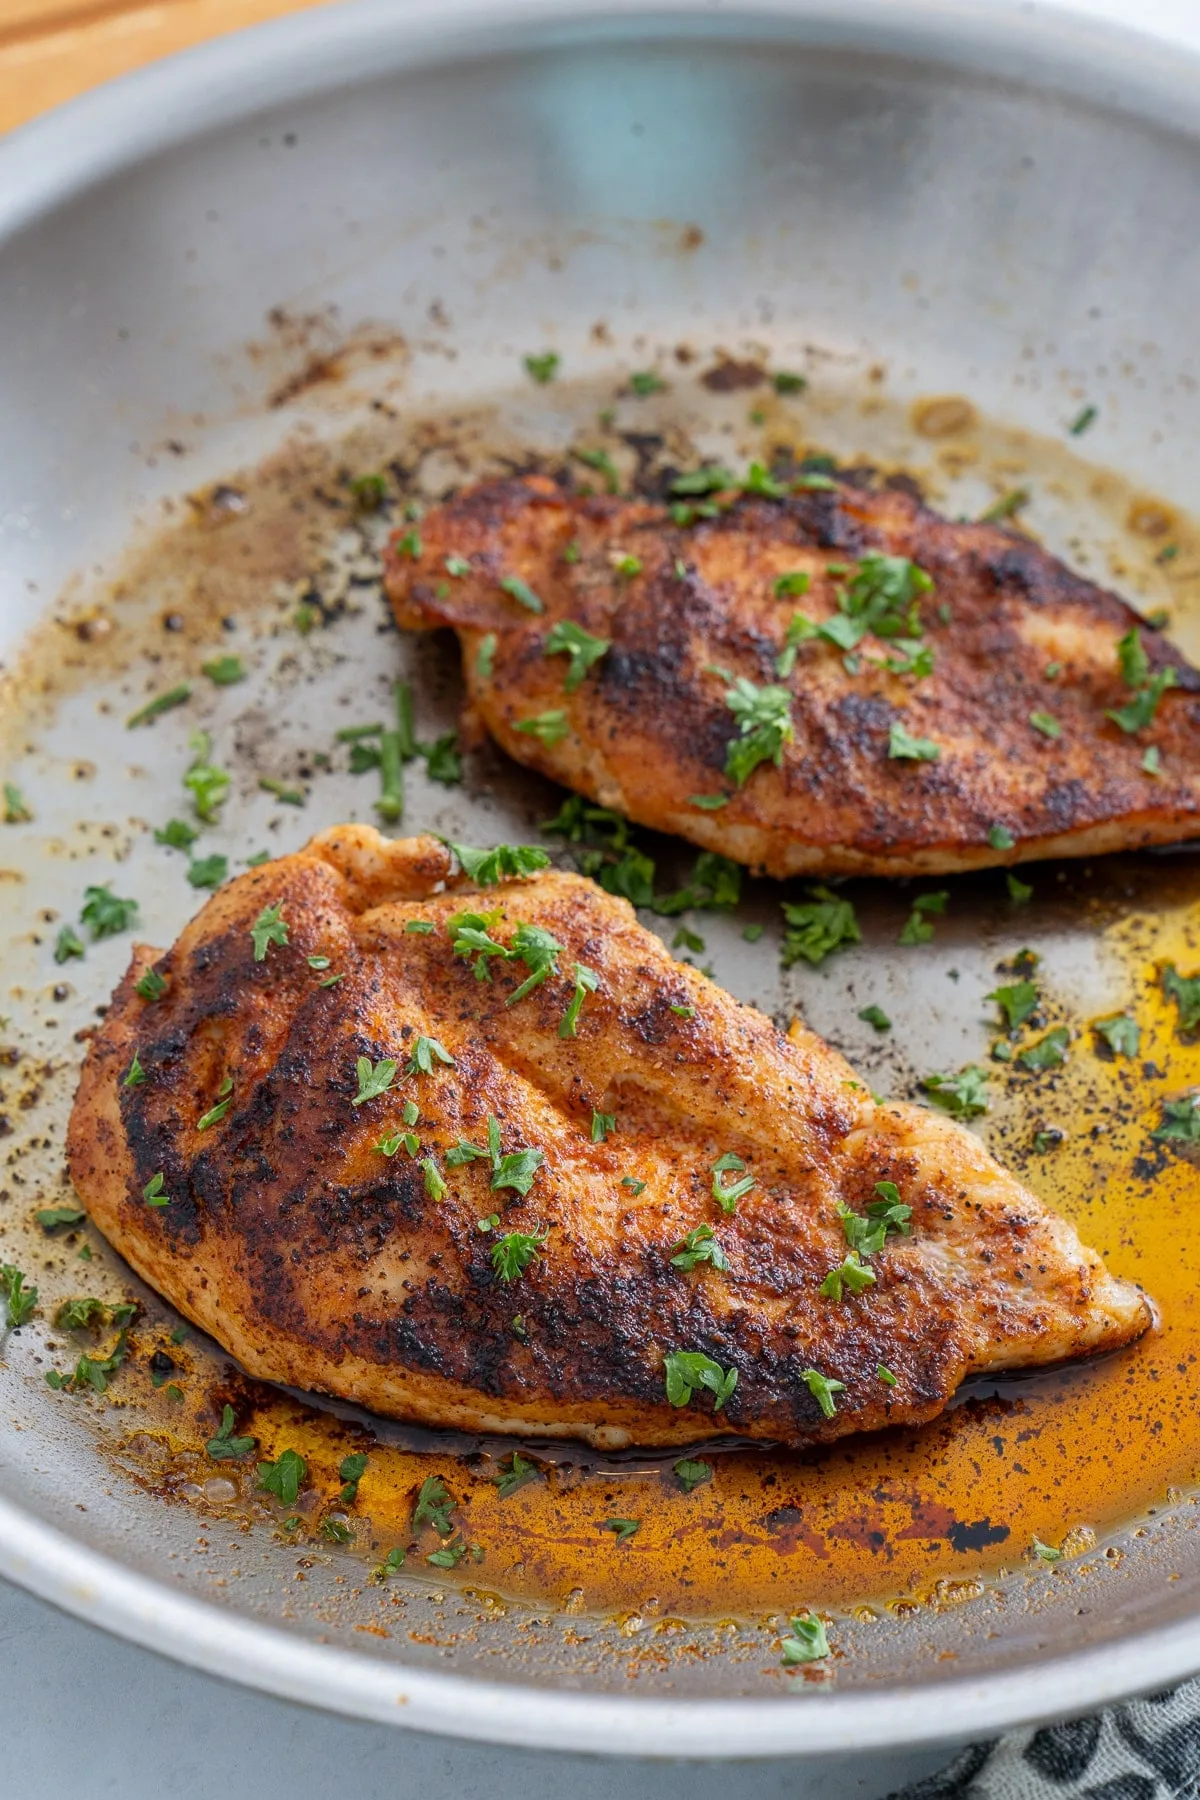
Image source: Bing (Web (fair-use with source credit))
Step 1: Prep Your Chicken (What It Should Look Like)
Start with your chicken breast. Place it on a cutting board and cover it with plastic wrap or parchment. Use a meat mallet or a heavy skillet to pound it to an even half-inch thickness.
You're looking for a uniform shape, not a weird, uneven blob. An even thickness means it cooks at the same rate. No skinny parts that dry out while the thick center is still raw.
Season generously on both sides. Salt is not optional here. A properly seasoned chicken breast is the difference between "this tastes like chicken" and "this tastes incredible."
Visual checkpoint: The chicken should look pink and slightly glossy from the salt drawing out moisture. Don't worry, that's normal. Pat the surface dry with a paper towel before it hits the pan.
Dryer surface means better browning.
Step 2: Searing for the Perfect Golden Crust
Heat your skillet over medium-high heat. Add your butter, olive oil, or a combination. Wait until the fat shimmers.
That tells you it's hot enough to sear.
Lay the chicken in the pan. Let it sit. Don't touch it.
Don't peek. Let the heat do its work for 5 to 7 minutes.
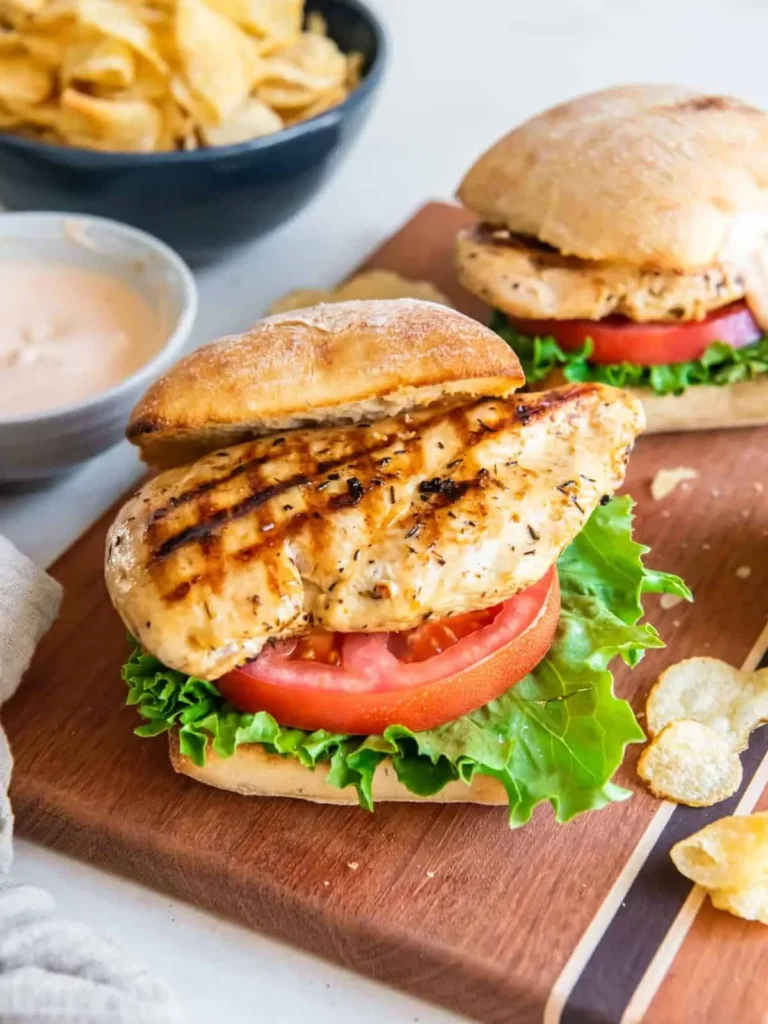
Visual checkpoint: You'll see the edges start to turn opaque white and then light golden. That's the magic moment. When the bottom is a deep, golden brown with crispy edges, it's ready to flip.
Not pale. Not burnt. Deep golden brown, like honey or caramel.
That's the crust you want.
Cook the other side for another 4 to 5 minutes. Check the internal temperature with a meat thermometer. It should read 165°F at the thickest point, according to USDA guidelines.
If it's not there yet, keep cooking in 1-minute increments.
Visual checkpoint: When done, the chicken should feel firm but still give slightly when pressed. The juices should run clear, not pink. Let it rest on a cutting board while you build the sauce.
Step 3: Building the Garlic Parmesan Sauce
The sauce is where things can go wrong if you're not watching closely. It's also where the visual cues really save you.
Start with your fat. Melt butter in the same skillet you used for the chicken. Add your minced garlic.
Here's the moment: cook until the garlic is fragrant but not browned. Garlic goes from aromatic to burnt in about 15 seconds. Once it turns dark brown, it becomes bitter, and there's no fixing that.
Visual checkpoint: The garlic should be soft, pale gold, and just starting to release its smell. That's your signal to add the cream or the rest of the sauce ingredients.
Whisk in your cream, parmesan, and seasonings. Keep stirring as it warms. The sauce will start thin, then thicken as the cheese melts and the cream reduces.
Visual checkpoint: You're looking for a sauce that coats the back of a spoon. Run your finger through it. If the line holds its shape, it's thick enough.
If the sauce runs back together, keep cooking. This usually takes 2 to 3 minutes. Don't rush it.
Step 4: Toasting the Bun and Final Assembly
Don't skip this step. Toasting the bun is structural integrity. A stale, soft bun will disintegrate under the weight of the chicken and sauce.
Use the residual fat in the pan or add a bit of butter. Place the cut side of your bun down in the hot skillet. Toast for 60 to 90 seconds.
Visual checkpoint: The bun should be golden brown, crisp to the touch, but not dark or burnt. You're toasting for structure, not flavor.
Now the assembly. Start with sauce on the bottom bun. This creates a moisture barrier that protects the bread.
Add the chicken. Add more sauce. Finish with a sprinkle of parmesan and a quick broil or a return to the pan to melt it.
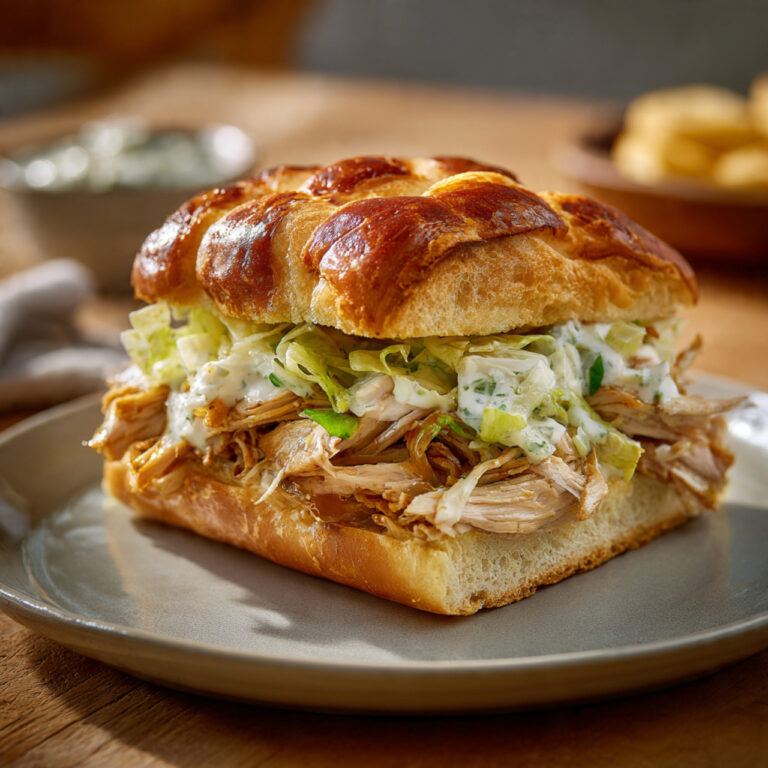
Visual checkpoint: The cheese should be melted and bubbly, not rubbery. The sandwich should hold its shape when you pick it up. The juices should be absorbed by the sauce, not soaking through the bun.
This is what you're aiming for.
The Visual Checkpoints: What Good Looks Like at Every Stage
Let's condense all of that into a quick reference. Here are the exact visual cues you should look for at every stage.
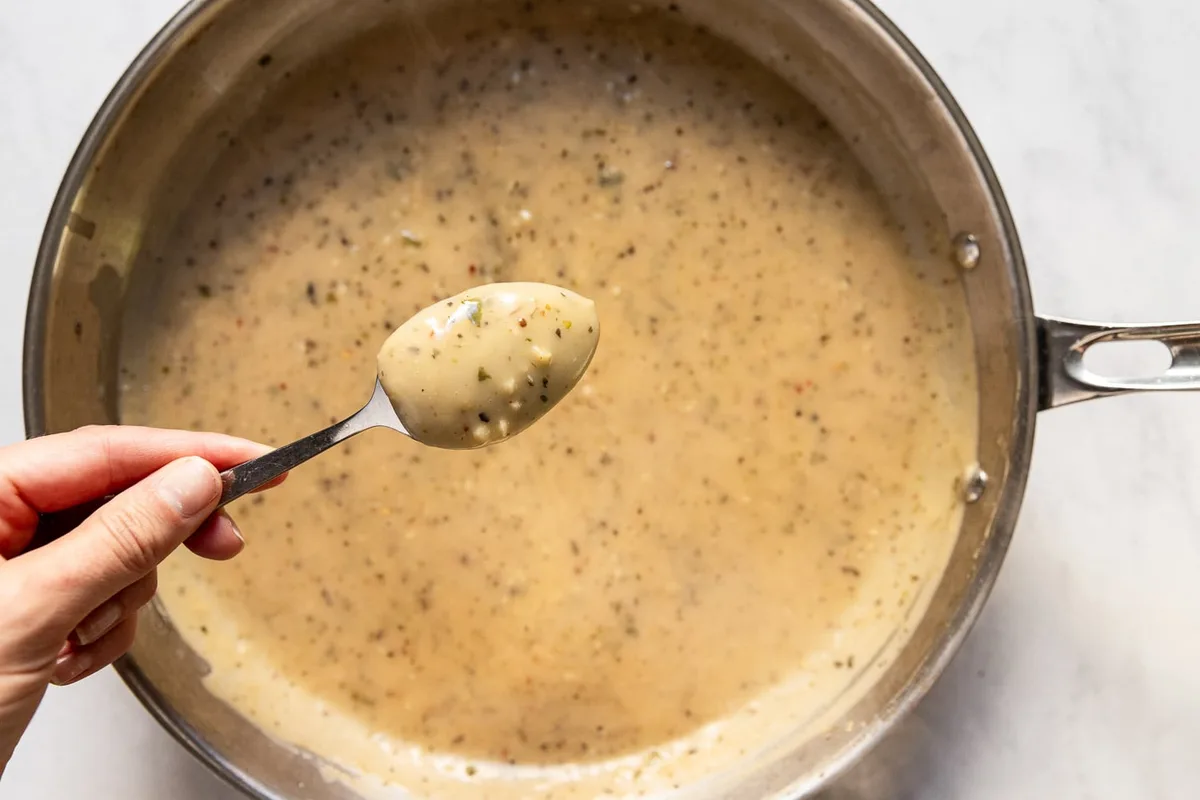
Image source: Bing (Web (fair-use with source credit))
The sear on the chicken:
- Good: Deep golden brown edges, crispy texture, juices release slowly.
- Bad: Pale white surface, rubbery texture, chicken steaming in water.
The garlic in the sauce:
- Good: Soft, pale gold, fragrant.
- Bad: Dark brown, bitter smell, scorched appearance.
The sauce consistency:
- Good: Coats the back of a spoon, holds a line when you swipe through it.
- Bad: Thin, watery, runs off the chicken immediately.
The parmesan melt:
- Good: Silky, creamy, blended into the sauce.
- Bad: Gritty, clumping, separated from the liquid.
The bun toast:
- Good: Golden, crisp, sturdy.
- Bad: Pale, soft, or burnt with black edges.
The final sandwich:
- Good: Holds its shape, cheese melted, sauce visible but not dripping.
- Bad: Sliding apart, bread soggy, sauce pooling on the plate.
These are your reference points. If something doesn't look right, trust your eyes. A sauce that looks thin will taste thin.
Chicken that looks pale will taste bland. The visual cues are your best indicator of what's happening at a chemical level. Learn to read them, and you won't need to follow a recipe word-for-word ever again.