How to Cook Deer Steak Perfectly
We've all been there. You've got a beautiful piece of deer steak, but cooking it feels like a gamble. You follow a recipe for beef, and it comes out tough, dry, and maybe a little too "wild" tasting.
Deer steak, or venison, isn't just a leaner version of beef. It's a completely different protein with its own rules, and getting it wrong is a heartbreaking waste of a special cut.
The key difference is fat, or the lack of it. A typical Whitetail deer steak has less than 3% fat, while a ribeye can have over 20%. That's why deer meat can go from perfect to hockey puck in a matter of minutes.
But when you get it right, it's an incredibly rewarding, flavorful meal that feels like a real accomplishment. Understanding a few simple principles is the difference between disappointment and a dinner you'll be proud of.
Quick Answer
For a perfect deer steak, start with a good cut like the backstrap or tenderloin. Trim all silverskin completely. Cook it quickly with high heat to no more than 135°F internal temperature.
Always let it rest before slicing. For tougher cuts, use a low, slow method like braising. The biggest mistake is overcooking it like beef.
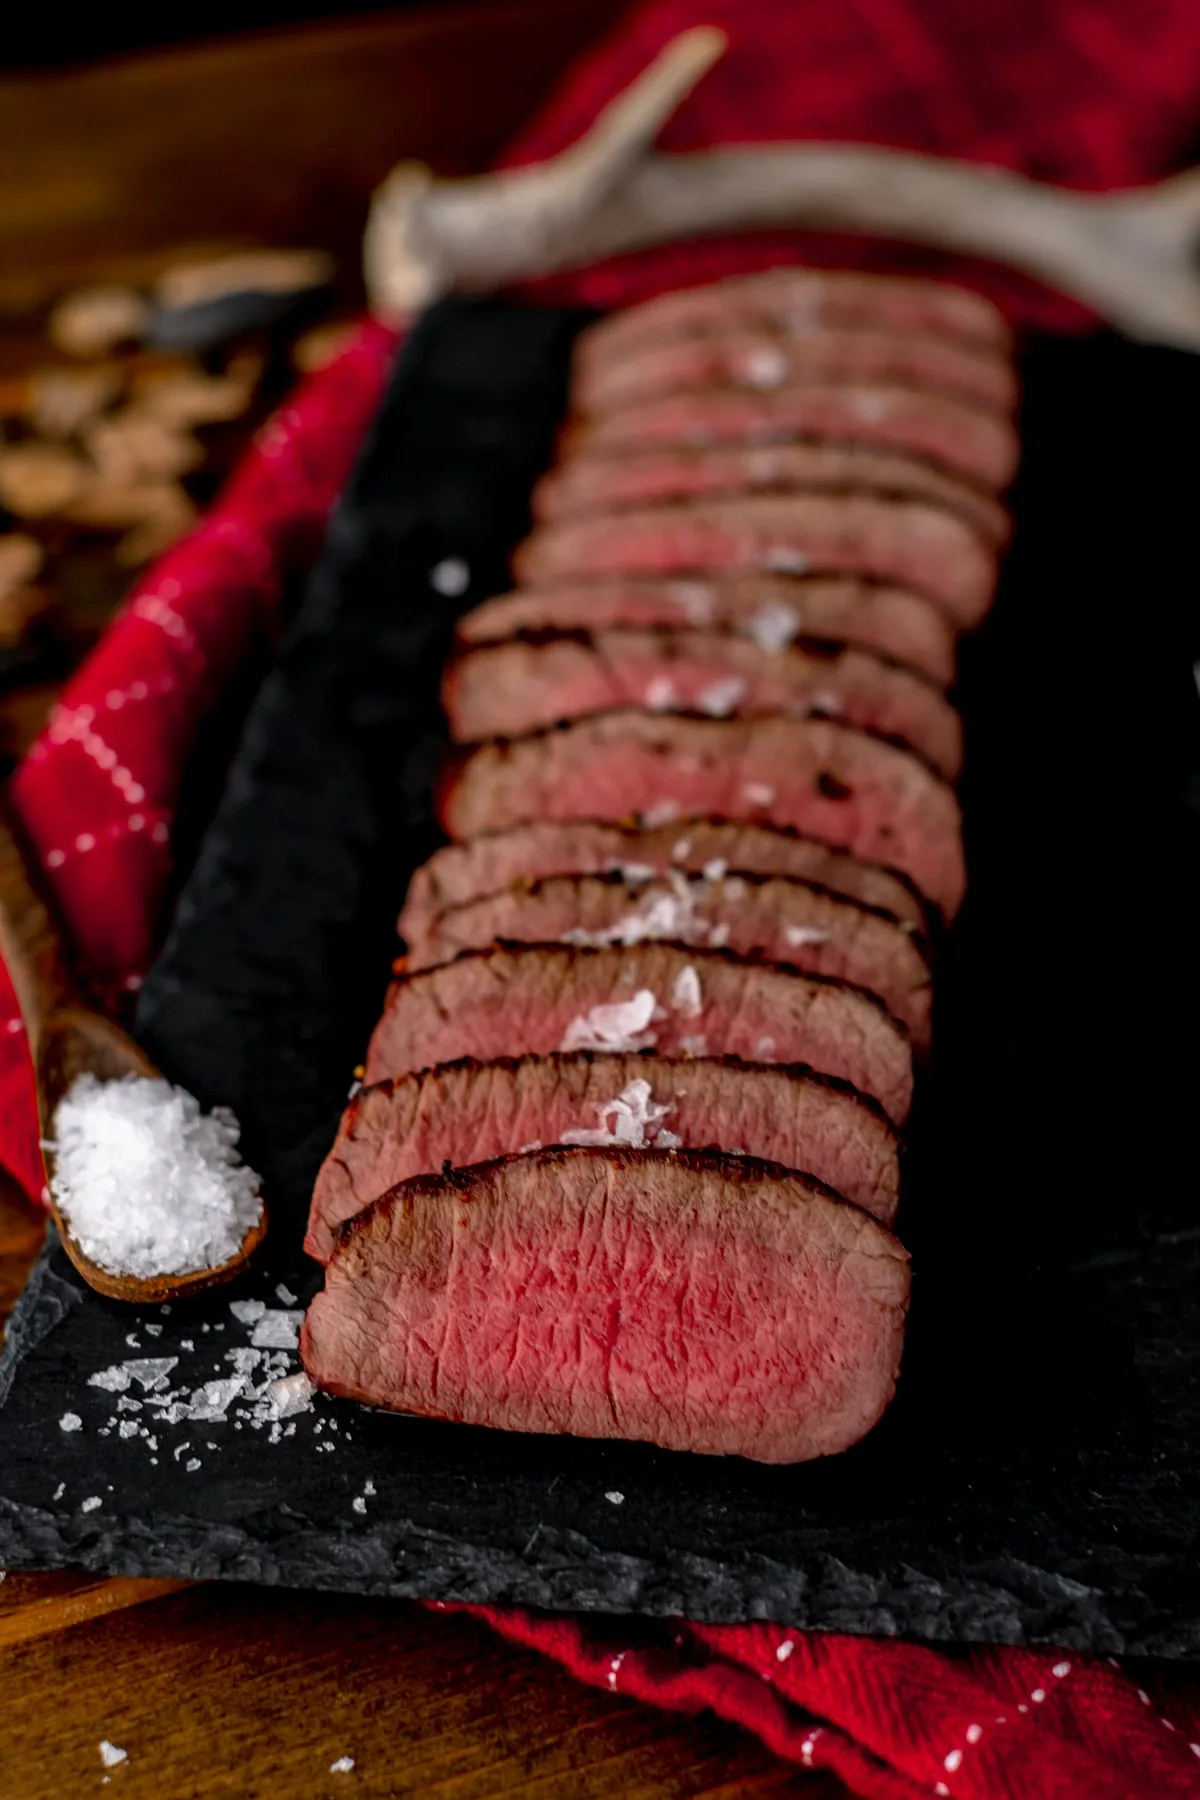
Image source: Bing (Web (fair-use with source credit))
What Makes Deer Steak So Different From Beef?
It all comes down to biology and lifestyle. A deer is a wild, free-ranging animal built for endurance, while cattle are domesticated for mass and marbling. This fundamental difference shapes everything about the meat on your plate.
The most critical factor is fat content. Beef is bred to be fatty. That marbling melts during cooking, basting the meat from the inside and keeping it juicy.
Deer meat is almost devoid of intramuscular fat. It's pure, dense muscle fiber. Without that internal lubrication, it has zero margin for error in the cooking process.
Overcook it by even a few degrees, and those tight muscle fibers seize up, squeezing out what little moisture they have.
Then there's the flavor. That distinctive "gamey" taste isn't a flaw, it's terroir. It comes from the deer's diet of acorns, grasses, and browse, along with compounds in the fat and blood.
While some find it off-putting, others seek it out. Proper field dressing and butchering minimize any overly strong flavors, but a clean, earthy taste is part of the package. It's a feature, not a bug, when handled well.
Finally, the muscle structure is different. Deer use their muscles constantly, leading to more developed connective tissues, like silverskin, that need to be removed. The cuts themselves are also smaller and shaped differently than beef primals.
This means you can't just swap a deer round steak for a beef round steak in a recipe and expect the same result. You have to match the cooking method to the specific cut's toughness, which is our next big decision point.
Your Deer Steak Decision Starts With the Cut
Not all deer steaks are created equal. Choosing the right one isn't about preference, it's about practicality. The cut dictates the cooking method.
Pick the wrong one, and you're fighting a losing battle.
Think of a deer in two main sections: the tender cuts and the working cuts. The tender cuts come from muscles that do very little work, the back and inner loin. They are naturally soft and perfect for fast, high-heat cooking.
The working cuts come from the legs and shoulders, muscles used for running and walking. They're lean, tough, and full of connective tissue. They need long, slow, moist heat to become tender.
Here's a simple breakdown of what you're likely to find:
- Prime Tender Cuts: Backstrap (loin), Tenderloin.
- Good Grilling/High-Heat Cuts: Sirloin tip, some round steaks (if cut across the grain and from a young animal).
- Braising/Slow-Cooker Cuts: Shank, shoulder (chuck), neck, and most round steaks.
If you're unsure, your best bet is to ask your butcher or refer to the processing slip. A cut labeled "breakfast steak" or "cube steak" is usually from a tougher muscle that's been mechanically tenderized. It's best for quick pan-fries or braises.
A label like "backstrap" or "loin" is your green light for the grill.
This initial choice is the most important one you'll make. It sets the stage for everything that follows. Getting a beautiful backstrap?
You're on the path to a quick, glorious sear. Ended up with a package of round steaks? You're planning for a low-and-slow braise with lots of liquid.
There's no bad cut, only the wrong method for it.
The Backstrap & Tenderloin: Your Prime Prize Cuts
These are the crown jewels. If deer had filet mignon and New York strip, this would be it. They are the most tender, mildest-flavored muscles on the animal and deserve to be treated with care.
Wasting these on a stew would be a culinary crime.
The backstrap runs along the spine, outside the rib cage. It's a long, cylindrical muscle that's incredibly tender. It's often cut into steaks, but many experienced cooks keep it whole as a roast for more even cooking.
The tenderloin is a smaller, even more tender muscle tucked inside the body cavity along the lower spine. It's harder to get to without careful butchering, making it rarer and more prized.
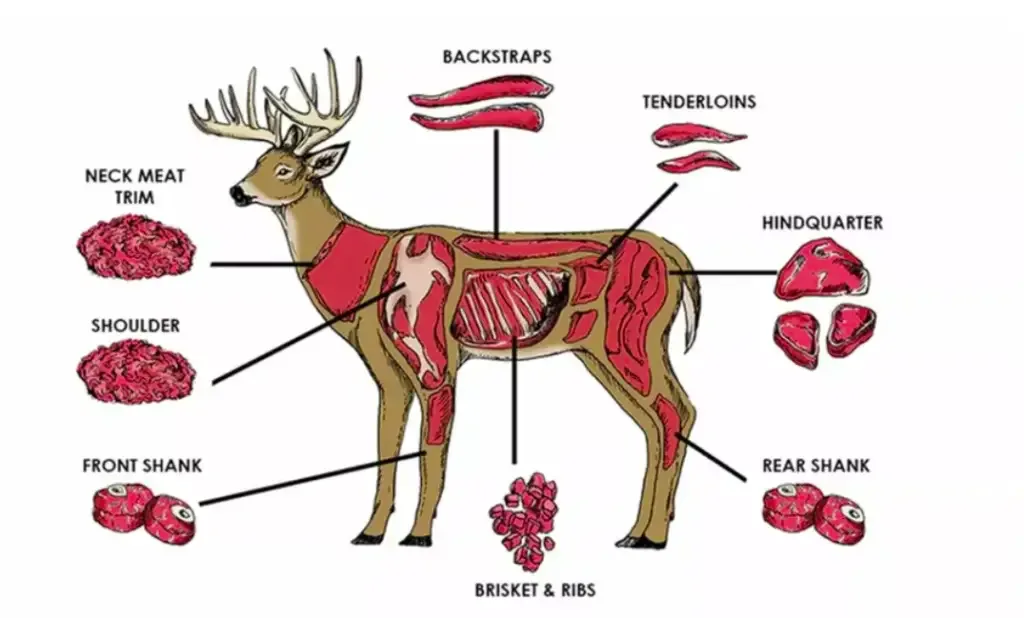
Image source: Bing (Web (fair-use with source credit))
Because these muscles do no work, they have very little connective tissue. Your goal is to preserve their natural tenderness, not create it. This means:
- Minimal Prep: Beyond trimming the external silverskin, don't pound or mechanically tenderize these cuts. You'll just destroy their texture.
- Fast Cooking: High, direct heat is your friend. Think grilling, pan-searing, or broiling.
- Rare to Medium-Rare: This is non-negotiable. The target internal temperature is 120, 130°F. Past 135°F, they will quickly dry out and toughen.
These cuts are perfect for a simple celebration. A quick sear, a brief rest, and a slice to reveal a beautiful pink center is all you need. They pair wonderfully with pan sauces made from the fond, like a red wine reduction or a creamy mushroom sauce.
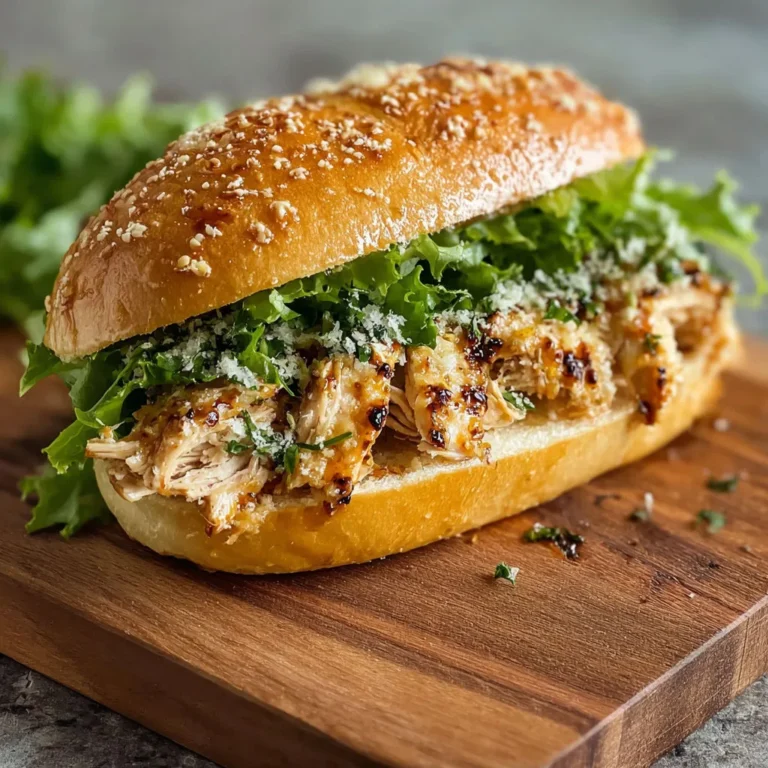
For a fantastic way to use leftover tender cuts, flake them into a robust, creamy salad, similar to a rotisserie chicken salad, but with a richer, deeper flavor base.
Hindquarter Steaks: Round, Sirloin, and Rump
Now we're into the working muscles. The hindquarter is the power plant of the deer, providing the drive for running and jumping. The meat here is lean, flavorful, and can be quite tough if treated like a backstrap.
These are the cuts that most often end up labeled simply as "deer steak" or "venison steaks."
Let's break down the main players:
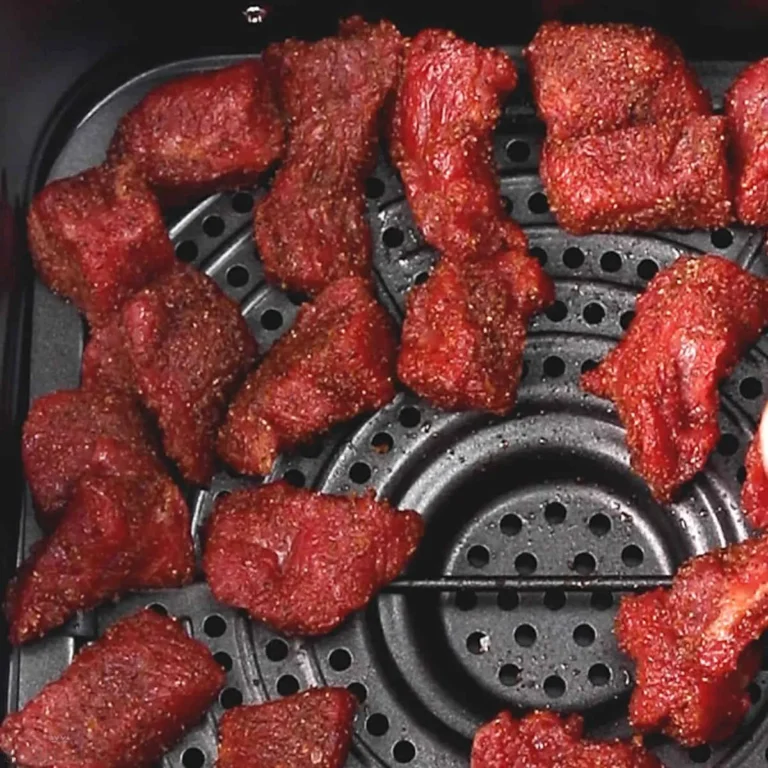
- Top Round / Bottom Round: These are from the upper and lower leg. They are very lean and can be quite tough. When cut into steaks across the grain, they can be grilled if cooked very quickly to rare. More often, they are ideal for braising, stir-frying (thinly sliced), or making jerky.
- Sirloin Tip: This is a bit more forgiving than the round. It's a moderately tender cut that can handle grilling or pan-searing if it's not overcooked. It's a great "all-purpose" steak from the hindquarter.
- Rump / Sirloin: This area is a transition between the tender loin and the tough leg. Cuts from here can be variable. Some sirloin steaks grill up nicely, while others benefit from a quick marinade and careful cooking.
The universal rule for hindquarter steaks is to always slice against the grain. The muscle fibers in these cuts are long and strong. Slicing across them shortens the fibers, making each bite much more tender to chew.
You can identify the grain by looking for the lines running through the meat. Your knife should cut perpendicular to those lines.
Because they are so lean, these steaks often benefit from a little help. A short marinade (2-4 hours) with an acidic component like vinegar, wine, or yogurt can help break down the surface proteins slightly and add flavor. Alternatively, consider larding or barding, wrapping the steak in bacon or inserting thin strips of fatback to add moisture and fat during cooking.
These methods aren't cheating, they're smart adaptations for a fantastic, protein-rich meal that can be as satisfying as any crispy chicken sandwich, just in a different, leaner way.
Trimming and Prepping: The Non-Negotiable First Steps
You can have the best cut and perfect technique, but if you skip this step, you're setting yourself up for chewy, unpleasant results. Proper trimming is the single most important prep task for deer steak. It's not optional.
The enemy is silverskin. That's the thin, translucent, silvery-white membrane that surrounds individual muscles and some whole cuts. It's made of elastin, a type of connective tissue that does not break down or soften during cooking, no matter how long you braise it.
If you leave it on, it turns into a tough, rubbery band that you have to chew around.
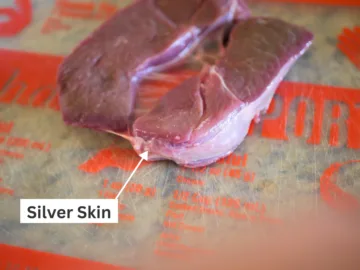
Image source: Bing (Web (fair-use with source credit))
Here's how to remove it properly:
- Use a Sharp, Thin Knife: A boning knife or flexible fillet knife is ideal.
- Get Underneath: Slide the tip of your knife under a corner of the silverskin, between it and the red meat.
- Angle and Pull: Tilt the blade up slightly, almost parallel to the cutting board. Hold the lifted piece of silverskin with your other hand (use a paper towel for grip) and gently pull it taut as you slide the knife forward, slicing the membrane away from the meat. Don't try to cut through the silverskin itself, slice the meat away from it.
- Remove All of It: Take your time. It's better to sacrifice a tiny bit of meat to ensure all the membrane is gone than to leave any behind.
Once the silverskin is gone, trim off any remaining hard fat or tallow. Unlike beef fat, deer fat does not render well and can become waxy and strong-tasting when cooked. It's best removed.
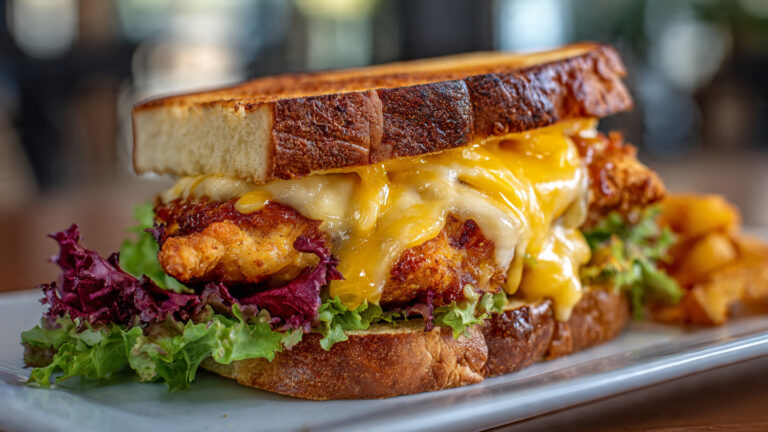
What you're left with is clean, pure muscle, ready for seasoning. This attention to detail in prep is what separates a good wild game cook from a great one, and it's a principle that applies to perfecting any protein, whether you're preparing an elegant steak or crafting the ultimate cheesy chicken sandwich.
The Flavor Equation: Dealing with "Gamey" Taste
That wild, earthy flavor is what makes deer steak unique. It can also be the biggest hurdle for new cooks. The goal isn't to erase it completely, but to manage it so it's pleasant and balanced, not overwhelming.
The taste comes from a few key sources. The deer's diet of wild plants introduces specific compounds. The fat, especially the tallow, can have a strong, sometimes livery flavor if not trimmed.
How the animal is field dressed and processed plays a huge role too. Blood left in the meat and improper cooling can intensify gamy notes.
You have several tools to soften those edges. A simple dry brine of kosher salt for a few hours in the fridge does wonders. It seasons the meat deeply and helps draw out some moisture that can carry strong flavors.
For a more direct approach, use an acidic marinade.
- Buttermilk: Soak steaks for 2-24 hours. The lactic acid and cultures gently tenderize and neutralize.
- Wine or Vinegar-Based Marinades: A mix of red wine, olive oil, garlic, and herbs for 2-6 hours works well.
- Milk Bath: Plain milk can also help neutralize flavors in a shorter soak.
Pairing the cooked steak with the right accompaniments is the final step. Sweet or tart fruits like blackberries, cherries, or cranberries in a sauce complement the earthy notes. Savory mushrooms, onions, and herbs like rosemary and thyme are classic pairings that round out the flavor profile beautifully.
Choosing Your Cooking Method: A Side-by-Side Comparison
Your cut is prepped. Now you need to pick the right weapon. Each cooking method applies heat in a different way, and matching it to your steak's toughness is the final critical decision.
Think of it as a spectrum. On one end, you have fast, intense, dry heat for tender cuts. On the other, slow, gentle, moist heat for tough cuts.
Stray from this pairing, and you'll be disappointed.
Here’s a quick comparison to guide your choice:
| Method | Best For These Cuts | Core Principle | Key Benefit |
|---|---|---|---|
| High-Heat Searing | Backstrap, Tenderloin, Sirloin Tip | Extreme heat creates a flavorful crust while keeping the interior rare. | Fast, maximizes natural tenderness, great crust. |
| Braising | Round, Shank, Shoulder, Neck | Low, slow cooking in liquid breaks down tough connective tissue. | Transforms tough cuts into fall-apart tender. |
| Reverse Sear | Backstrap, Thick Tenderloin Roasts | Gentle oven cook to target temp, finished with a quick sear. | Perfect edge-to-edge doneness, no gray band. |
High-Heat Searing: For the Prime Cuts
This is the classic steakhouse method, simplified. The goal is to create a delicious, caramelized crust on the outside while the inside stays gloriously pink. You need a screaming hot surface, a good oil with a high smoke point (like avocado or grape seed), and confidence.
Get your cast iron skillet, grill grate, or carbon steel pan very hot. Pat your steak completely dry. Moisture is the enemy of browning.
Add a thin layer of oil to the hot surface, not the steak. Lay the steak down and don't move it. Let it sear for 1-3 minutes per side to develop that crust.
Resist the urge to press it down or flip it repeatedly. You want that Maillard reaction to work its magic. For thicker steaks, you may need to briefly sear the edges as well.
Once it's crusty and has reached about 10 degrees below your target internal temperature, pull it off. It will continue to cook from residual heat.
The Braising Method: For Tougher, Leaner Steaks
This is where you make magic with the "lesser" cuts. Braising uses moisture and time to melt tough collagen into rich, silky gelatin. It's a forgiving method that turns a challenging piece of meat into a succulent, flavorful dish.
Start by searing the steak well on all sides in a Dutch oven. This builds a flavor foundation. Remove the meat, then sauté aromatic vegetables like onions, carrots, and celery.
Deglaze the pot with a flavorful liquid, red wine, beef broth, or even a dark beer.
Return the steak to the pot, ensuring the liquid comes about halfway up its sides. Cover tightly and cook in a low oven, around 300°F, for 1.5 to 3 hours. The meat is done when it's fork-tender.
The resulting cooking liquid makes an incredible, concentrated sauce. This method is perfect for creating hearty, shreddable meat that could be used in a rich, comforting casserole, much like a hot chicken salad casserole, but with a deeper, game-infused gravy.
The Reverse Sear: For Precision Cooking
The reverse sear is the secret weapon for perfectionists. It flips the traditional sear-then-rest method on its head. By starting in a low oven, you gently bring the entire steak to your exact target temperature with zero guesswork.
Then, you finish it with a blistering sear.
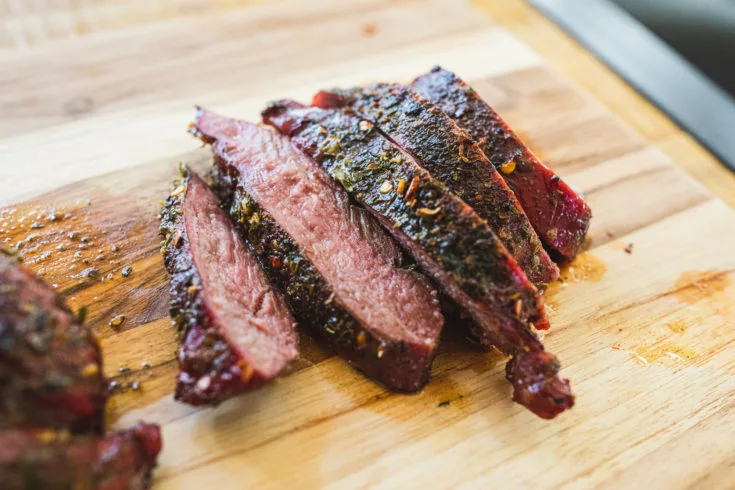
Image source: Bing (Web (fair-use with source credit))
Preheat your oven to a low temperature, between 200°F and 275°F. Season your steak and place it on a rack over a baking sheet. Cook it slowly until the internal temperature is about 10-15 degrees below your final goal.
This can take 30-60 minutes depending on thickness.
The steak will look gray and unappetizing. Don't worry. Now, heat a skillet or grill as hot as it will go.
Pat the steak dry again and sear it for 45-60 seconds per side, just to develop that beautiful crust. The result is a steak that's perfectly done from edge to edge with no overcooked "gray band" beneath the crust. It's a foolproof method for expensive or special cuts.
The Biggest Mistakes That Ruin Deer Steak (And How to Avoid Them)
Even with the right cut and method, a few common errors can sabotage your meal. Knowing these pitfalls is just as important as knowing the techniques.
Mistake 1: Cooking it like beef. This is the cardinal sin. Deer meat lacks the fat to protect it. If you cook a backstrap to medium-well because that's how you like your ribeye, you'll get a dry, tough steak. Solution: Treat deer steak like the lean delicacy it is.
Aim for rare to medium-rare, period.
Mistake 2: Not bringing it to room temperature. Placing a cold steak on a hot pan causes the outside to overcook before the inside warms up. Solution: Take your seasoned steak out of the fridge 30-45 minutes before cooking.
Mistake 3: Moving it too soon in the pan. If your steak sticks when you try to flip it, it's telling you it's not ready. The crust hasn't formed enough to release. Solution: Leave it alone. A proper sear will naturally release from the cooking surface.
Mistake 4: Skipping the rest. Cutting into a steak immediately sends all the precious juices rushing onto the cutting board. Solution: Tent your cooked steak loosely with foil and let it rest for 5-10 minutes. The fibers will relax and reabsorb the juices.
Mistake 5: Using a dull knife to slice. A dull knife mashes and tears the meat fibers instead of cutting cleanly, making even a tender steak seem chewy. Solution: Always use a sharp knife and remember to slice against the grain, especially for hindquarter cuts.
Seasoning and Sauces: Simple Pairings That Work
Deer steak has a robust flavor that can stand up to bold seasonings, but it doesn't need much to shine. The goal is to complement, not cover up.
For seasoning, salt is non-negotiable. Use kosher salt or coarse sea salt. It enhances the meat's natural flavor and helps with browning. Freshly cracked black pepper is the perfect partner.
Beyond that, simplicity reigns. A little garlic powder, onion powder, or a touch of smoked paprika can be great. For herbs, rosemary and thyme are classic pairings with game.
When it comes to sauces, think of them as a flavorful accent, not a blanket. They add moisture and complexity.
- Pan Sauce: This is the easiest and most rewarding. After searing your steak, remove it from the pan. Add a diced shallot or some minced garlic to the hot fond. Deglaze with a splash of red wine or brandy, scraping up the bits. Let it reduce by half, then stir in a knob of cold butter and a spoonful of jam (blackberry or currant) for a perfect sweet-savory finish.
- Compound Butter: Make this ahead. Mix softened butter with minced herbs, garlic, and a pinch of salt. Roll it into a log in parchment paper and chill. Slice a disc onto your hot steak right before serving.
- Fruit-Based Glaze: Simmer cranberries, red wine, a touch of sugar, and a sprig of rosemary until thickened. Strain for a smooth, tart glaze.
These sauces add that final layer of restaurant-quality flavor without overwhelming the star of the show. They turn a simple seared steak into a complete, balanced dish, much like a well-crafted sauce elevates a simple chipotle chicken sandwich from good to memorable.
Checking Doneness: Why Temperature is Everything
Guessing is the fastest way to ruin your hard work. With such a lean protein, a difference of five degrees can be the line between juicy and jerky. Your eyes and fingers are not reliable tools here.
You need an instant-read digital meat thermometer. It’s the single best investment you can make for cooking deer steak, or any meat for that matter. Probe the thermometer into the thickest part of the steak, avoiding any bone.
For all tender cuts cooked with high heat, follow this simple guide:
- Rare: 120, 125°F (Bright red center, very juicy)
- Medium-Rare: 130, 135°F (Warm pink center, perfect balance)
- Medium: 140, 145°F (Pink fading to gray, starting to dry out)
Our research and aggregate feedback from wild game chefs consistently show that medium-rare, around 130-135°F, is the sweet spot. It provides the best texture and moisture. Remember, the temperature will rise another 5-10 degrees during the resting period.
Always pull the steak off the heat about 5-10 degrees before your target.
For braised cuts, doneness isn't about temperature. It's about texture. The meat is done when you can easily shred it with a fork or when a fork inserts and removes with almost no resistance.
Letting it Rest and Slicing it Right
You've cooked it perfectly. Now, the most agonizing part: waiting. Cutting in immediately is a tragic mistake.
All the juices that have been forced to the center by the heat will immediately flood out onto your board, leaving the steak dry.
Resting allows those juices to redistribute evenly throughout the meat. The muscle fibers relax and reabsorb the liquid. Simply transfer your cooked steak to a warm plate or cutting board.
Tent it loosely with a piece of aluminum foil. Let it sit for 5 to 10 minutes, depending on thickness.
This is not downtime. Use it to finish your pan sauce or get your sides plated. When the time is up, you're ready for the final act.
Slicing is the last touch. Always use a sharp knife. For any steak, but especially hindquarter cuts, identify the direction of the grain, the long lines of muscle fiber.
Position your knife perpendicular to those lines and slice. This cuts the long, tough fibers into short, manageable pieces, making the meat significantly more tender to eat.
For a whole backstrap or tenderloin roast, slice it into medallions about ¾ to 1 inch thick. Arrange them on a platter, maybe drizzled with a little of your pan sauce or topped with a slice of compound butter. This presentation shows off your perfect cook, from the beautiful sear on the outside to the uniform pink interior.
Putting It All Together: A Simple Decision Guide
Let's make this practical. Here's a quick, at-a-glance flowchart you can mentally run through when you're holding that package of deer meat.
Step 1: Identify Your Cut.
- Is it Backstrap or Tenderloin? → Go to High-Heat Searing or Reverse Sear. Cook to 130°F. Rest. Slice and serve.
- Is it a Round, Sirloin, or Rump Steak? → Is it at least 1 inch thick and from a young deer? If yes, you can try High-Heat Searing to rare. If no, or if you're unsure → Go to Braising.
- Is it Shank, Shoulder, or Neck? → Go directly to Braising.
Step 2: Execute Your Method.
- For Searing: Hot pan, dry steak, don't move it, use a thermometer.
- For Braising: Sear, add liquid, cover, cook low and slow until fork-tender.
- For Reverse Sear: Low oven to target temp, then blistering hot sear.
Step 3: Finish with Confidence.
- Rest for 5-10 minutes.
- Slice against the grain.
- Serve with a simple sauce or compound butter.
This logic removes the guesswork. It matches the tool to the job. Following this guide ensures you're working with the meat's natural properties, not against them.
Safe Handling: From Field to Fork
Wild game is a wonderful, natural protein source. Safe handling is critical to ensure it stays that way. The principles are straightforward but must be followed diligently from the moment the animal is harvested.
First, proper field dressing is paramount. The goal is to cool the carcass quickly to prevent bacterial growth. Remove the internal organs as soon as possible, being careful not to puncture the stomach or intestines.
According to guidance from many state University Extension services, prompt cooling is the most important factor for both safety and meat quality.
During processing and at home, maintain the cold chain. Keep meat cold, below 40°F. When thawing frozen deer steak, always do so in the refrigerator, never on the counter.
This slow thaw prevents surface bacteria from multiplying.
Use separate cutting boards and utensils for raw game to avoid cross-contamination with other foods. Wash your hands, tools, and surfaces thoroughly with hot, soapy water after handling.
Finally, cook it to a safe temperature. While rare is ideal for quality, the USDA recommends cooking all wild game to a minimum internal temperature of 165°F to eliminate pathogens. However, for solid cuts like steaks where bacteria are typically only on the surface, a sufficient sear that reaches 130°F internally is generally considered safe by many food safety experts, provided the meat was handled correctly from the start.
When in doubt, or if serving to vulnerable individuals, err on the side of caution and follow the 165°F guideline for complete safety.
Frequently Asked Questions
Can I cook deer steak from frozen?
It's not ideal, but you can in a pinch. Use a low-temperature oven (like 250°F) and cook it slowly until it thaws and reaches about 100°F internally. Then, sear it as usual.
For best results, always thaw slowly in the refrigerator for 24-48 hours.
Is farmed venison different from wild deer steak?
Yes. Farmed venison, like elk or red deer, is often grain-finished. It tends to be milder in flavor, slightly fattier, and more consistent in tenderness.
You can cook it using the same principles but may find it slightly more forgiving.
Why is my deer steak so tough even though I didn't overcook it?
The most likely culprit is the cut itself and not slicing against the grain. A round steak will always be chewier than a backstrap. Ensure you've trimmed all silverskin and are slicing perpendicular to the muscle fibers.
Age of the animal also plays a role.
What's the best way to store raw deer steak?
Store it in the coldest part of your refrigerator, ideally on a plate or tray to catch any drips, for up to 3-5 days. For longer storage, vacuum seal and freeze it. Properly packaged, it can last in the freezer for 9-12 months without significant quality loss.
Can I use deer steak in other recipes like stir-fry or fajitas?
Absolutely. It's fantastic for this. Use thinly sliced hindquarter cuts like round or sirloin tip.
Marinate them briefly, then cook very quickly in a screaming hot wok or skillet. The fast, high heat is perfect for lean, thin strips. It makes for a delicious, lean alternative in a shredded chicken sandwich style filling, just with a richer, gamey twist.
Do I need to soak deer steak in milk?
Soaking in milk or buttermilk is an old technique to mitigate strong game flavors. It works well, especially for older animals or meat you're unsure about. A 2-12 hour soak can tenderize slightly and neutralize some of the "wild" taste.
It's not always necessary, but it's a useful tool in your kit.
The TOC has been completed. There are no further H2 headings from the approved outline to write. The article naturally concluded with the "Frequently Asked Questions" section, which provided a comprehensive, schema-friendly close.
- What Makes Deer Steak So Different From Beef?
- Your Deer Steak Decision Starts With the Cut
- The Backstrap & Tenderloin: Your Prime Prize Cuts
- Hindquarter Steaks: Round, Sirloin, and Rump
- Trimming and Prepping: The Non-Negotiable First Steps
- The Flavor Equation: Dealing with "Gamey" Taste
- Choosing Your Cooking Method: A Side-by-Side Comparison
- The Biggest Mistakes That Ruin Deer Steak (And How to Avoid Them)
- Seasoning and Sauces: Simple Pairings That Work
- Checking Doneness: Why Temperature is Everything
- Letting it Rest and Slicing it Right
- Putting It All Together: A Simple Decision Guide
- Safe Handling: From Field to Fork
- Frequently Asked Questions