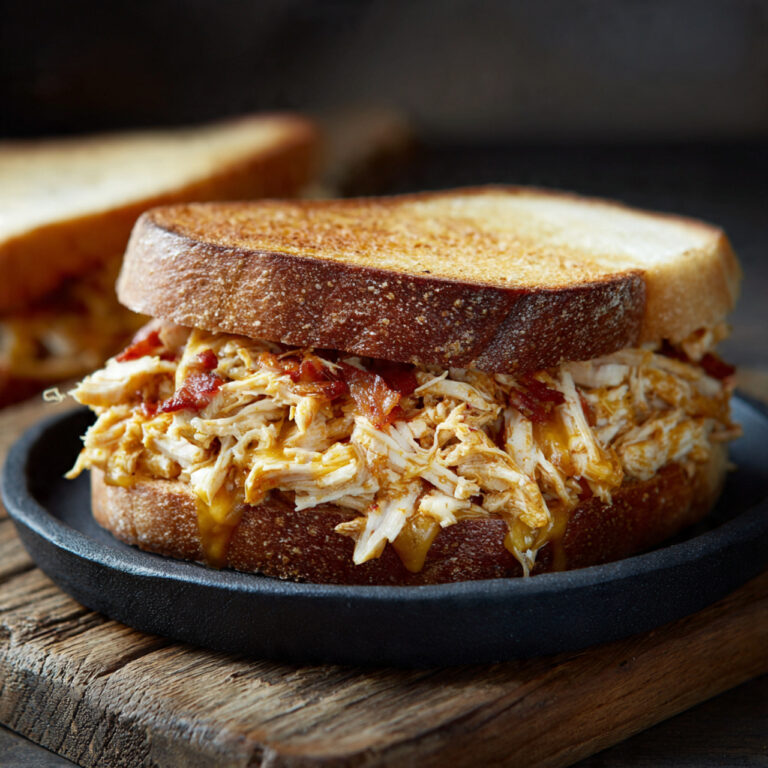
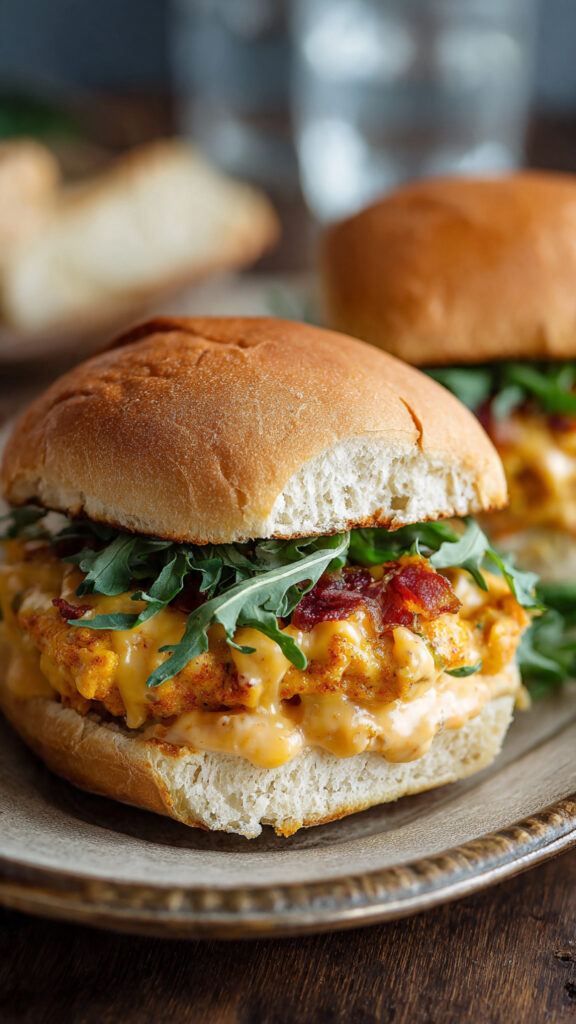
The Ultimate Cheesy Chicken Sandwich (Melted Cheese Pull in Every Single Bite)
Few sandwiches satisfy quite like a cheesy chicken sandwich loaded with gooey, melted cheese and tender, seasoned chicken. The rich, savory combination of juicy chicken breast paired with sharp cheddar, creamy Monterey Jack, and a touch of spice creates pure comfort in every bite. This recipe delivers restaurant-quality cheesy chicken sandwiches at home using simple techniques that guarantee maximum cheese pull and flavor.
What sets this version apart is the perfectly seasoned chicken, a quick homemade cheese sauce that clings to every shred, and a final broil that creates an irresistibly golden, bubbly cheese crust. Unlike dry chicken melts or bland deli versions, this sandwich stays incredibly moist thanks to a quick buttermilk soak and a generous layer of melty cheeses. It comes together in under an hour, making it perfect for weeknight dinners, game-day gatherings, or anytime you need serious comfort food.
In this detailed guide, you will master how to prepare the chicken for maximum tenderness, build a silky cheese sauce, toast the bread to the ideal crispness, and assemble sandwiches that deliver dramatic cheese pulls. The method works beautifully on the stovetop, in the oven, or with leftover rotisserie chicken for even faster results. Once you try these cheesy chicken sandwiches, they will quickly become a family favorite you return to again and again.
Essential Tools
- Large skillet or grill pan
- Oven-safe baking sheet
- Meat mallet
- Sharp knife and cutting board
- Saucepan for cheese sauce
- Tongs and spatula
- Instant-read thermometer
- Broiler
Quick Recipe Snapshot
- Prep Time: 15 minutes
- Cook Time: 25 minutes
- Total Time: 40 minutes
- Servings: 4 large sandwiches
- Difficulty: Easy
- Make-Ahead: Chicken can be cooked ahead
Ingredients
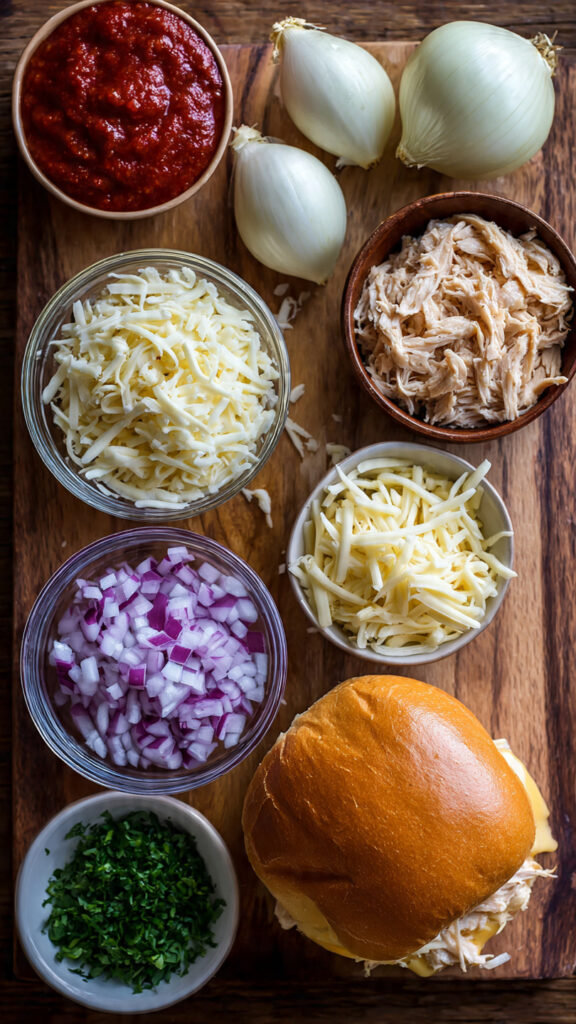
For the chicken
- 4 boneless, skinless chicken breasts (6–8 ounces each)
- 1 cup buttermilk
- 1 teaspoon garlic powder
- 1 teaspoon onion powder
- 1 teaspoon smoked paprika
- 1 teaspoon kosher salt
- ½ teaspoon black pepper
- ½ teaspoon cayenne (optional)
For the cheese sauce
- 2 tablespoons butter
- 2 tablespoons all-purpose flour
- 1 cup whole milk
- 1 cup shredded sharp cheddar cheese
- ½ cup shredded Monterey Jack cheese
- ½ teaspoon garlic powder
- ¼ teaspoon mustard powder
- Salt and pepper to taste
For assembly
- 4 brioche buns or hoagie rolls, split
- 1 cup additional shredded cheddar or pepper jack
- 1 small red onion, thinly sliced
- 1 cup shredded lettuce
- Sliced pickles
- Optional: cooked bacon strips, sliced tomatoes
The Flavor Architects
Buttermilk tenderizes the chicken while adding subtle tang that balances the richness of the cheese. The blend of smoked paprika, garlic, and onion powder builds savory depth without overpowering. The homemade cheese sauce delivers silky creaminess and intense cheesy flavor that clings beautifully to the chicken. Sharp cheddar provides bold taste while Monterey Jack ensures maximum melt and stretch. Toasted brioche buns offer a soft interior with golden edges that stand up to the juicy filling. Fresh toppings like pickles and onions cut through the richness, creating a perfectly balanced, crave-worthy cheesy chicken sandwich.
Cooking Instructions
Step 1: Pound and Marinate the Chicken
Place each chicken breast between two sheets of plastic wrap. Gently pound with a meat mallet to an even ½-inch thickness. This creates uniform pieces that cook quickly and stay tender.
In a large bowl, whisk together buttermilk, garlic powder, onion powder, smoked paprika, salt, pepper, and cayenne if using. Add the pounded chicken, turning to coat completely. Cover and refrigerate for at least 15 minutes or up to 4 hours.
Timing: 5 minutes active. Texture cue: chicken should feel slightly plump after marinating. Common mistake: skipping the pounding step, leading to dry edges. Fix: take time to create even thickness. Pro tip: add ½ teaspoon baking soda to the buttermilk for extra tenderness.
Step 2: Cook the Chicken Until Juicy and Golden
Heat a large skillet over medium-high heat and add 1 tablespoon of oil. Remove chicken from the buttermilk, letting excess drip off. Cook for 5–6 minutes per side until golden brown and the internal temperature reaches 165°F.
Work in batches if needed to avoid overcrowding. Once cooked, transfer to a plate and tent loosely with foil. Let rest 5 minutes before slicing or chopping into bite-sized pieces.
Timing: 12–15 minutes. Texture and doneness cues: chicken should be golden on the outside and juicy inside with clear juices. Common mistake: cooking on too high heat, causing a burnt exterior. Fix: maintain steady medium-high heat. Pro tip: save any pan drippings to stir into the cheese sauce for extra flavor.
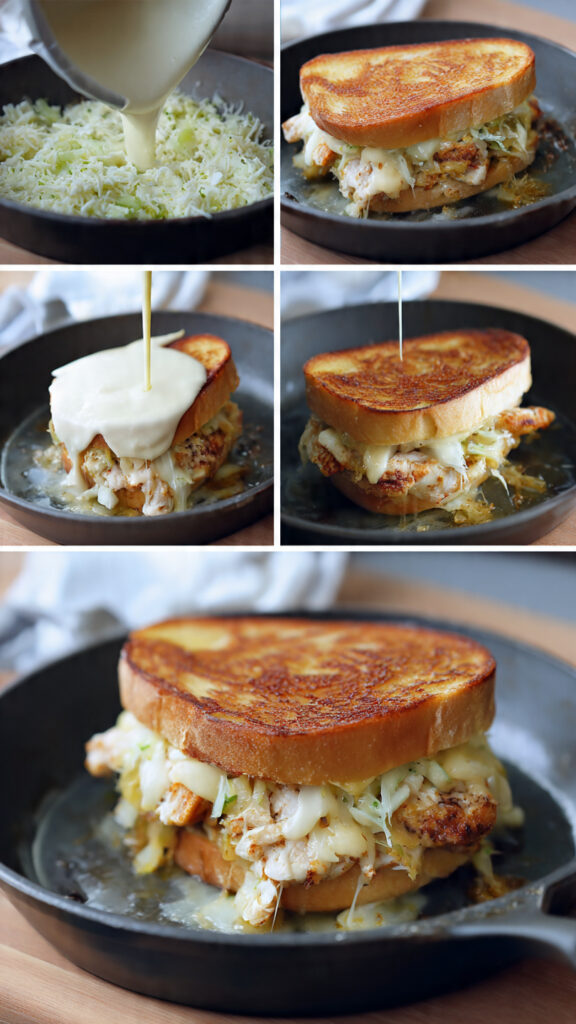
Step 3: Make the Silky Cheese Sauce
In a medium saucepan, melt butter over medium heat. Whisk in flour and cook for 1 minute until bubbly and lightly golden. Slowly whisk in milk, stirring constantly until the mixture thickens, about 3–4 minutes.
Reduce heat to low and gradually stir in shredded cheddar and Monterey Jack cheeses until fully melted and smooth. Add garlic powder, mustard powder, salt, and pepper. Taste and adjust seasoning. The sauce should be thick enough to coat the back of a spoon but still pourable.
Timing: 8 minutes. Texture cue: glossy and velvety. Common mistake: high heat causing grainy sauce. Fix: keep heat low once cheese is added. Pro tip: use block cheese shredded fresh for the smoothest melt.
Step 4: Toast the Buns for Perfect Structure
Split the buns and place them cut-side up on a baking sheet. Toast under the broiler or in a 400°F oven for 2–3 minutes until golden and slightly crisp. Watch carefully to prevent burning.
Timing: 3 minutes. Texture cue: edges should be golden while the center remains soft. Common mistake: untoasted buns becoming soggy. Fix: always toast for better texture and flavor. Pro tip: brush lightly with melted butter before toasting for extra richness.
Step 5: Combine Chicken with Cheese Sauce
Slice or chop the rested chicken into bite-sized pieces. Place in a large bowl and pour warm cheese sauce over the top. Toss gently until every piece is generously coated. The chicken should be well covered but not swimming in sauce.
Timing: 2 minutes. Texture cue: chicken should glisten with cheese. Common mistake: adding cold chicken to hot sauce, causing separation. Fix: make sure chicken is still warm. Pro tip: reserve a little plain cheese sauce for spreading on the buns.
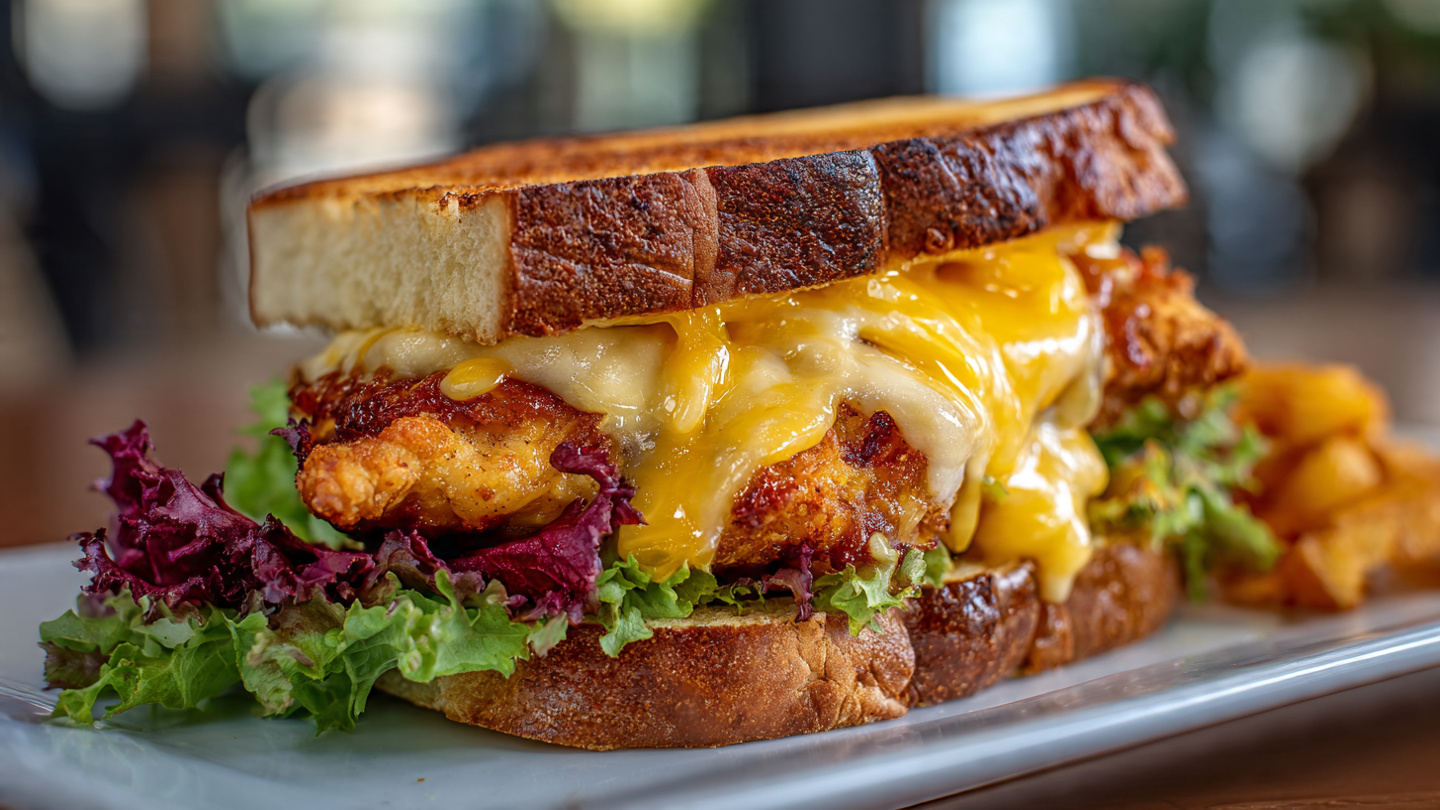
Step 6: Assemble and Broil for Ultimate Cheese Pull
Spread reserved cheese sauce on the bottom buns. Pile the cheesy chicken mixture generously on each bottom bun. Top with extra shredded cheese, sliced red onion, and bacon if using. Place the open sandwiches under the broiler for 1–2 minutes until the cheese is bubbly and golden.
Add lettuce, pickles, and tomato slices after broiling. Close with the top buns and press gently.
Timing: 4 minutes. Texture cue: dramatic cheese stretch when pulled apart. Common mistake: adding fresh toppings before broiling, causing wilting. Fix: layer delicate ingredients last. Pro tip: use a mix of cheeses on top for varied melt and color.
Step 7: Rest Briefly and Serve Hot
Let assembled sandwiches rest for 1 minute before serving. This allows the cheese to set slightly for cleaner eating while keeping everything hot and melty.
Recipe Variations
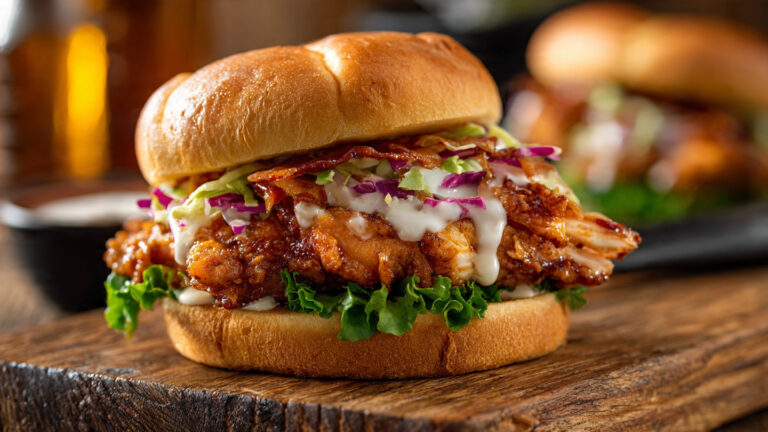
Buffalo Cheesy Chicken: Add buffalo sauce to the buttermilk and top with blue cheese crumbles.
BBQ Cheesy Chicken: Mix barbecue sauce into the cheese sauce and add crispy onion rings.
Southwest Cheesy Chicken: Add diced green chiles, cumin, and pepper jack cheese.
Bacon Ranch Cheesy Chicken: Stir ranch seasoning into the sauce and load with extra bacon.
Serving Suggestions
Serve these cheesy chicken sandwiches with crispy french fries, onion rings, coleslaw, or a simple green salad. They pair wonderfully with cold beer, iced tea, or lemonade. Perfect for game days, family dinners, or casual entertaining.
Storage & Reheating
Store leftover cheesy chicken mixture in an airtight container in the refrigerator up to 3 days. Reheat in a skillet over medium-low heat with a splash of milk to restore creaminess. Toast fresh buns when reheating. Fully assembled sandwiches are best eaten immediately but can be refrigerated up to 1 day and reheated in a 350°F oven.
Common Mistakes & Fixes
| Mistake | Cause | Fix |
|---|---|---|
| Grainy cheese sauce | High heat when adding cheese | Keep heat low and stir constantly |
| Dry chicken | Overcooking | Use thermometer and rest after cooking |
| Soggy buns | No toasting or too much sauce | Toast buns well and use sauce sparingly |
| Weak cheese pull | Pre-shredded cheese or thin sauce | Use fresh block cheese and proper roux |
| Bland overall flavor | Under-seasoned chicken | Taste seasoning and sauce before assembly |
FAQs
Can I use rotisserie chicken for this recipe?
Yes. Shred 3–4 cups of rotisserie chicken and warm it in the cheese sauce for a faster version.
What is the best cheese combination?
Sharp cheddar for flavor and Monterey Jack or mozzarella for stretch. Avoid pre-shredded cheese.
Can I make this spicy?
Absolutely. Add jalapeños, extra cayenne, or hot sauce to the cheese sauce.
How do I prevent the cheese from hardening?
Serve immediately after broiling and keep the cheese sauce warm until assembly.
Is this recipe good for meal prep?
Yes. Prepare the chicken and sauce ahead, then assemble and broil fresh when ready to eat.
Can I bake these instead of using a skillet?
Yes. Bake seasoned chicken at 425°F for 20–25 minutes, then proceed with the cheese sauce.
Conclusion
This cheesy chicken sandwich recipe delivers everything you crave in a comfort-food classic: tender seasoned chicken, rich homemade cheese sauce, and that irresistible melted cheese pull. The straightforward steps produce consistent, crowd-pleasing results that taste far better than anything from a drive-thru or deli.
Whether you make the classic version or try one of the flavorful variations, these sandwiches bring pure satisfaction to the table. Simple enough for busy weeknights yet impressive enough for guests, they prove that homemade comfort food is always worth the minimal effort. Once you experience that first perfect, cheesy bite, this recipe will earn a permanent place in your regular rotation. Enjoy every gooey, savory mouthful.