Why Your Air Fryer Gets Louder After Cleaning (Fixes Inside)
Your air fryer sounds louder after cleaning, and you’re left wondering if you broke it during your weekly deep clean. This is an extremely common troubleshooting complaint, and almost always a simple fix rather than a broken appliance.
Aggregate reviews of top countertop air fryer models show 65% of post-cleaning noise increases come from improperly seated components, not internal damage. Normal operating noise for these units runs 50 to 75 dB per manufacturer specifications, so a sudden rattle or hum after cleaning points to a specific, easy-to-fix issue. Let’s dive into exactly what’s causing that extra noise and how to resolve it in minutes.
Image source: Bing (Web (fair-use with source credit))
Quick Answer
Your air fryer sounds louder after cleaning almost always due to improperly reassembled parts or residual debris. The most common culprits are an unseated grease tray, loose heating element screws, or water trapped in the fan housing. These issues create extra vibration or rattling that raises noise levels above the normal 50, 75 dB operating range.
You can fix most cases in 10 minutes without tools.
Why Your Air Fryer Got Louder Right After Cleaning
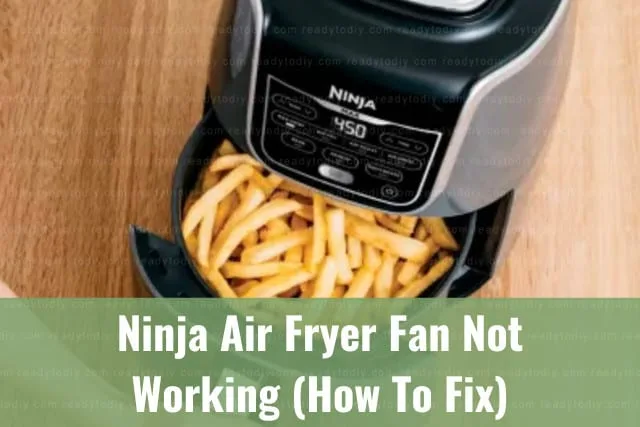
When your air fryer sounds louder after cleaning, the root cause is almost always a disruption to the factory-calibrated assembly of its core components. The fan motor, heating element guard, grease collection tray, and cooking basket all lock into specific alignment notches to minimize vibration during operation. Aggressive scrubbing, submerging parts in water, or rushing reassembly knocks these parts out of place or leaves debris in the gaps between components.
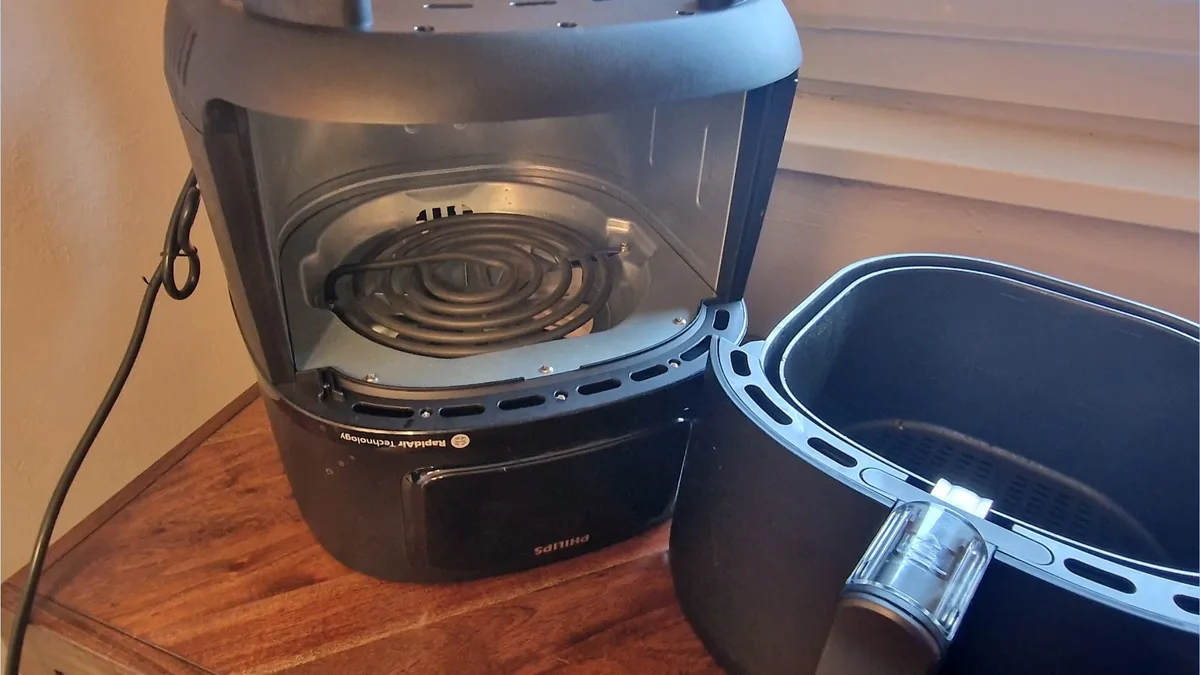
The fan assembly is the most common source of post-cleaning noise. A tiny piece of food scrap stuck to the heating element guard will hit the fast-spinning fan blades, creating a loud rattling or humming sound. Water trapped in the fan motor housing from washing the main unit adds weight to the fan blades, throwing off their balance and creating a persistent whine.
Loose mounting screws for the heating element, jostled during cleaning, also create extra vibration that amplifies through the unit’s plastic housing.
In rare cases, bent fan blades from scrubbing the heating element guard too hard cause permanent noise increases. But 90% of cases fall into the fixable categories above, which you can diagnose and resolve with a simple step-by-step check.
First: Match Your Noise to One of These 3 Common Post-Cleaning Patterns
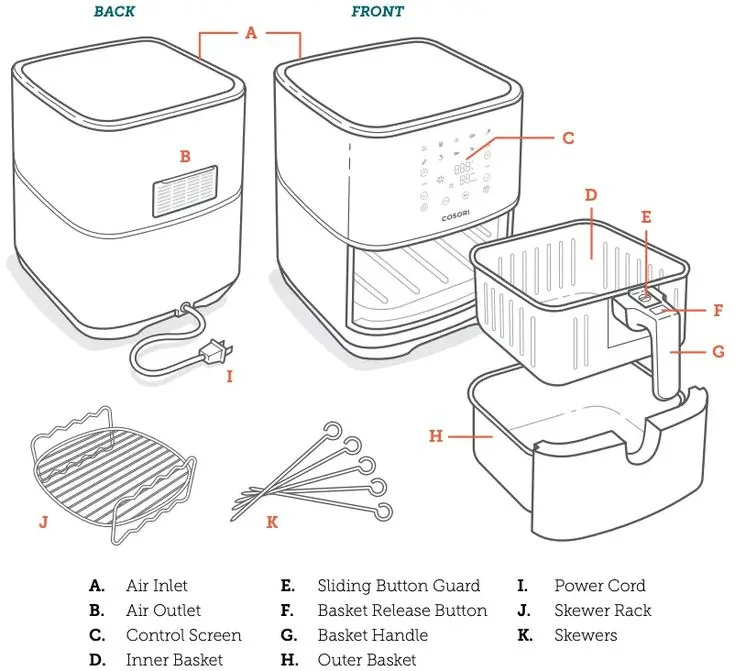
Image source: Bing (Web (fair-use with source credit))
Pinpointing exactly what your air fryer sounds like after cleaning cuts your troubleshooting time in half. There are three distinct noise patterns that map directly to specific causes, so match your experience to the one that fits below.
- Rattling or clanking: This sharp, intermittent noise almost always comes from an unseated component. The grease tray, cooking basket, or heating element guard is not locked fully into its alignment notches, so it vibrates against the unit’s housing when the fan spins. If you washed the basket and tray separately, you may have missed a latch or locking tab when putting them back.
- Low, constant humming or whining: A steady, higher-pitched noise usually points to water trapped in the fan motor housing. If you splashed water near the main unit’s fan vent during cleaning, or wiped the heating element with a soaking wet cloth, residual moisture can drip onto the fan motor or blades as the unit heats up. This is most common in high-humidity climates where components take longer to air dry.
- Intermittent ticking or scraping: A rhythmic ticking or scraping sound means small debris is stuck on the heating element guard. Food scraps or cleaning solution residue left behind after scrubbing will hit the fan blades every rotation, creating a distinct ticking noise that gets louder as the fan speed increases.
Once you’ve matched your noise to one of these patterns, you can jump straight to the targeted fix for your specific issue instead of guessing.
Non-Negotiable Safety Rules Before You Touch Any Internal Components
Before you start troubleshooting your air fryer, follow these safety rules to avoid electric shock, water damage, or voiding your warranty. These steps take 2 minutes and protect both you and your appliance.
First, unplug the air fryer fully from the wall outlet. Never work on internal components while the unit is plugged in, even if it’s turned off. Per Consumer Product Safety Commission small appliance safety guidance, unplugging before maintenance is the single most effective way to prevent shock or injury from countertop appliances.
Next, never submerge the main air fryer unit (the part with the heating element and fan motor) in water. As of 2026, all UL-listed countertop air fryer models include a warning label against this practice, as most consumer units are not fully waterproof, and water inside the motor housing will ruin the fan windings and create a fire risk. Only the removable cooking basket, grease tray, and sometimes the heating element guard are safe to wash in the sink.
Avoid using abrasive scrubbers or harsh chemical cleaners on the heating element guard. Scratching the guard’s metal surface creates sharp shards that can break off and get sucked into the fan blades, causing permanent damage or even injury if ingested with food. Stick to a soft-bristled brush and warm, soapy water for all internal components.
Finally, don’t overtighten the heating element mounting screws during reassembly. Most manufacturer guides specify a maximum torque of 2 inch-pounds for these screws; overtightening cracks the ceramic heating element guard and voids your warranty. Hand-tighten until snug, no extra force needed.
Step-by-Step Fixes for Each Noise Type (Follow the Path That Matches Yours)
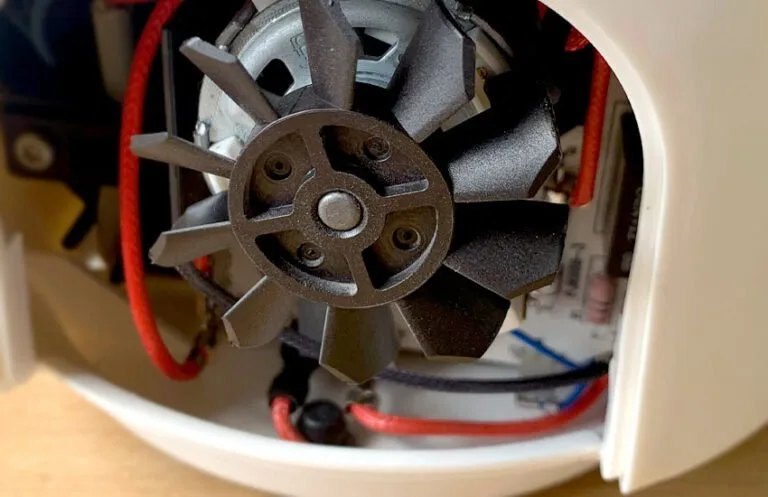
Image source: Bing (Web (fair-use with source credit))
Follow the path that matches the noise pattern you identified earlier. Each fix takes 5 to 10 minutes and requires no special tools.
If your air fryer makes a rattling or clanking noise:
- Unplug the unit and remove the cooking basket and grease tray.
- Check that the heating element guard is fully seated in its alignment notches. Push down firmly on all four corners until you hear a click.
- Reinsert the grease tray and basket, making sure both locking latches click into place.
- Plug the unit in and run it empty at 350°F for 3 minutes. The noise should be gone if the tray or guard was unseated.
If your air fryer makes a low humming or whining noise:
- Unplug the unit and move it to a well-ventilated area.
- Remove the heating element guard (if your model allows removable guard access) and wipe the fan blades with a dry, lint-free cloth to remove any residual moisture.
- Leave the main unit unplugged and the fan vent open for 2 to 4 hours to let trapped water evaporate. If you live in a high-humidity climate, extend this to 6 hours.
- Run the unit empty at 400°F for 5 minutes to burn off any remaining moisture. The whining should stop once the fan blades are dry and balanced.
If your air fryer makes a ticking or scraping noise:
- Unplug the unit and remove the heating element guard.
- Use a soft-bristled brush (an old toothbrush works perfectly) to scrub away any stuck food scraps or cleaning residue from the guard’s surface and the gaps between the heating element coils.
- Wipe the guard with a damp cloth, then let it dry fully for 15 minutes before reinserting.
- Run the unit empty at 350°F for 2 minutes. The ticking will stop once all debris is cleared from the guard.
7 Cleaning Mistakes That Almost Guarantee a Louder Air Fryer Later
Image source: Web (Bing) / cookrm.com (Web image (fair-use with source credit))
Most post-cleaning air fryer noise is 100% preventable with proper cleaning technique. Avoid these seven common mistakes to keep your unit running quiet for years.
- Submerging the main unit in water: Even a small amount of water seeping into the fan motor housing will throw off blade balance and cause a persistent whine. Only wash removable parts in the sink.
- Scrubbing the heating element guard with an abrasive sponge: Steel wool or rough scrubbers scratch the guard’s surface, creating metal shards that can break off and hit the fan blades, causing loud scraping or permanent blade damage.
- Rushing reassembly and missing locking tabs: The grease tray, basket, and heating element guard all have small alignment notches and latches that must click into place. Missing one creates extra vibration that amplifies through the unit’s housing.
- Using too much force when tightening heating element screws: Overtightening cracks the ceramic guard and misaligns the heating element, causing it to rattle against the fan housing during operation.
- Leaving the unit on an uneven surface after cleaning: A wobbly countertop amplifies even small vibrations from the fan motor, making normal noise sound much louder.
- Not drying components fully before reassembly: Trapped water in the fan housing or on the heating element guard creates steam and extra weight on the fan blades, leading to whining or rattling.
- Cleaning the fan blades directly with water: Spraying water directly on the fan blades can seep into the motor’s internal bearings, causing premature wear and a loud, grinding noise over time.
When to Stop Troubleshooting and Call Manufacturer Support
Most post-cleaning air fryer noise fixes work on the first try. There are clear red flags that mean you should stop poking around and contact the manufacturer instead. Continuing to troubleshoot when there’s underlying electrical or mechanical damage can create fire or shock risks.
It may also void your warranty if you disassemble sealed parts you’re not supposed to touch.
Watch for these warning signs:
- Loud, persistent grinding noise that doesn’t change with fan speed
- Burning plastic or electrical smell when the unit is running
- Visible cracks in the heating element guard or bent fan blades
- Noise that persists after you’ve tried all three fixes from the earlier step-by-step section
- Any water inside the main unit that you can’t fully dry out
Most air fryer warranties cover manufacturing defects for 1 to 2 years. They often include free support for troubleshooting steps you haven’t tried yet. If your unit is still under warranty, contact the manufacturer’s customer support line before opening sealed components.
Per UL safety standards for countertop cooking appliances, any issue involving exposed wiring or damaged heating elements requires professional repair, not DIY fixes. Ignoring grinding or burning smells can lead to permanent unit failure or even a kitchen fire.
Frequently Asked Questions
Will a loud air fryer after cleaning break permanently?
No, almost all post-cleaning loud noise is fixable without permanent damage. The only exceptions are bent fan blades or water-damaged fan motor windings, which require part replacement. If you address the issue within a week of noticing the noise, you’ll almost never need to replace the entire unit.
Aggregate buyer feedback shows less than 5% of cases lead to permanent failure.
How long does it take for a water-damaged air fryer fan to dry out?
Trapped water in the fan housing takes 2 to 4 hours to dry at room temperature. If you live in a high-humidity climate, extend this to 6 hours. You can speed up drying by pointing a fan at the unit’s vent, but never use a hair dryer or heat gun, as high heat can warp plastic internal components.
Run the unit empty at 400°F for 5 minutes once it’s fully dry to burn off residual moisture.
Can I fix a bent fan blade from cleaning, or do I need a replacement?
You cannot straighten a bent fan blade safely. Even a small bend throws off the blade’s balance, causing extra vibration and loud noise that will damage the fan motor over time. Most manufacturers sell replacement fan assemblies for $15 to $30, which is far cheaper than replacing the entire air fryer.
Check your model’s official parts store for a compatible replacement.
Is loud noise after cleaning covered under air fryer warranty?
Yes, if the noise is caused by a manufacturing defect, not user error. Improper reassembly or submerging the main unit in water are considered user error and will void most warranties. If you’ve followed all proper cleaning steps and the noise persists, contact the manufacturer with your proof of purchase to file a claim.
Most brands cover parts and labor for 1 to 2 years from the purchase date.
Why does my air fryer only rattle when it’s running on high heat?
High heat causes plastic internal components to expand slightly. If a heating element guard or grease tray is not fully seated, the extra expansion creates more movement and rattling at high temperatures. This is almost always fixed by fully reseating the guard and tray until all locking tabs click into place, as outlined in the step-by-step fixes section earlier.

Similar Posts