Best Battered Fish Recipe Secrets
Ever reached for a piece of fried fish and heard a satisfying crunch, only to bite into a sad, greasy layer of mush underneath? That's the universal frustration with battered fish. The promise of a crisp, shattering golden shell giving way to moist, tender fish is a simple one, but so many things can go wrong between your mixing bowl and the dinner plate.
Getting it right isn't about magic, it's about understanding a few key principles of temperature, timing, and contrast.
Our research into professional techniques and aggregate user feedback points to one critical factor: your oil must be at 350, 375°F (175, 190°C). That single data point separates success from a soggy mess. Let's walk through the real decisions you need to make to get that perfect crunch every time.
Quick Answer
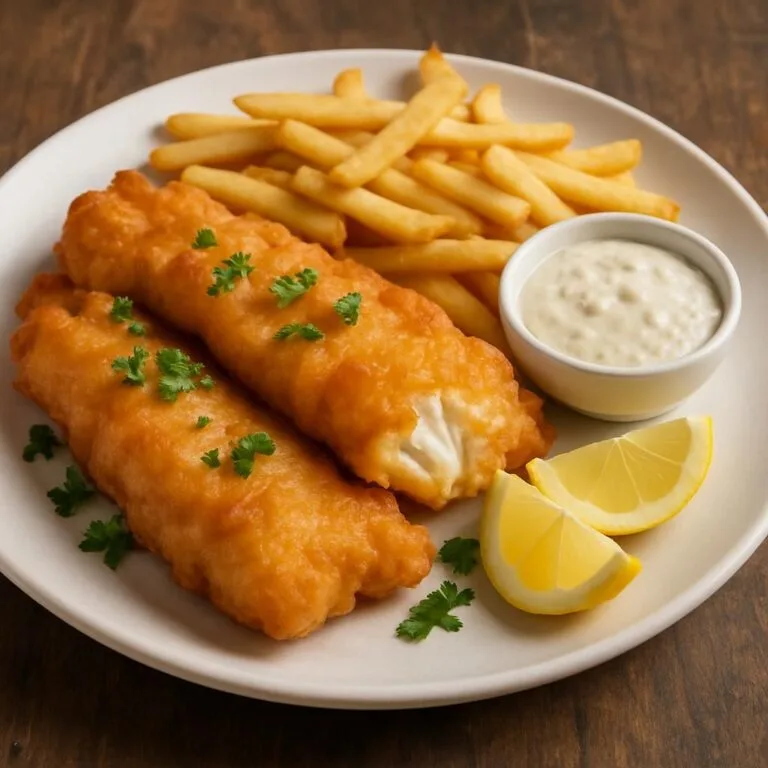
For perfect battered fish, start with a firm white fish like cod. Pat it completely dry. Make a simple batter of flour, baking powder, salt, and a cold liquid.
The ideal frying temperature is 350°F. Heat your oil to this point before you start. Dredge each dry fillet in flour first.
Then dip it into the batter. Fry for 3 to,a6 minutes. The fish should be golden brown.
Let it drain on a rack, not paper towels.
Why Your Fried Fish Batter Is Never Quite Right (And How to Fix It)
You've probably followed a recipe to the letter and still ended up with a disappointing batch. The batter slid right off. It turned out pale and doughy.
Or it was dark and bitter while the inside was still raw. These aren't random failures. They're specific reactions to mistakes in a process.
The core issue almost always comes down to one of two things, moisture or heat. Moisture on the surface of your fish repels the batter, causing it to slip away. A wet batter hitting oil that's too cool will soak up fat before it can set, leading to greasiness.
Oil that's too hot will burn the coating before the fish cooks through. It's a balancing act where each step supports the next. Getting that initial coating to stick is your first line of defense against everything that follows.
The Quick Fix: It’s All About Temperature and Contrast
If you only take away one thing, let it be this. Your oil needs to be hot enough to instantly seal the batter's surface. Think of it like searing a steak.
That quick, violent reaction creates a barrier. It stops oil from seeping in and gives the interior time to steam gently.
The second part of the fix is contrast. A wet fish meets a wet batter, and they don't bond. You need a dry mediator.
That's why a light dredge in plain flour is non-negotiable. The dry flour sticks to the damp fish. The wet batter then clings to the flour.
It creates a mechanical bond that holds everything together during the fry. Skipping this step is asking for trouble, no matter how good your batter recipe is. For other dishes where a crispy exterior is key, like a proper homemade crispy chicken sandwich, similar principles of dryness and temperature apply.
How Batter Actually Works: More Than Just a Covering
Batter isn't just a wet jacket for fish. It's a reactive system. When mixed, the flour's proteins (gluten) and starches start to interact with the liquid.
When it hits hot oil, three things happen almost simultaneously.
First, the water in the batter flash-boils, creating steam. This steam tries to escape, puffing up the batter and creating its characteristic light, bubbly texture. Second, the starches on the surface gelatinize and then dehydrate, forming the rigid, crisp structure.
Finally, the proteins set, helping to lock that structure in place. The carbon dioxide in beer or sparkling water accelerates the first step, giving you bigger bubbles and a crispier, more delicate crust.
The goal isn't a thick, bready layer. It's a thin, cohesive, and brittle shell that protects and contrasts with the delicate fish inside. Understanding this reaction helps you troubleshoot.
A dense, tough batter often means you over-mixed, developing too much gluten. A flat, greasy one means your oil wasn't hot enough to trigger that explosive puffing and setting action. It's the same science behind getting a light, even coat on air fryer chicken tacos, where airflow replaces oil but the setting reaction is still crucial.
The Three Big Choices You Face When Making Batter
Before you even turn on the stove, you're faced with decisions that will define your final dish. These choices aren't about right or wrong. They're about matching a method to your goal, your ingredients, and your patience level.
Choice 1: Your Liquid Base (Beer, Soda Water, Milk, or Water)
This is your biggest flavor and texture lever. Each liquid brings a different personality to the batter.
- Beer: The classic for a reason. The carbonation makes the batter light, and the fermented flavors add depth. Lagers and pilsners are perfect. The batter can be a bit trickier, as it needs to stay very cold and be used quickly.
- Sparkling Water/Soda Water: The go-to for a tempura-style, super-crisp, and neutral coating. It gives you the lift of carbonation without any flavor of its own, letting the fish shine.
- Milk or Buttermilk: Creates a tender, slightly richer, and more pancake-like batter. It browns beautifully and has a lovely flavor, but the crust can be softer, not shatteringly crisp.
- Plain Water: The simplest option. It makes a serviceable, crisp coating but offers no leavening help, so it relies more on baking powder for lift. It's your reliable, no-fuss choice.
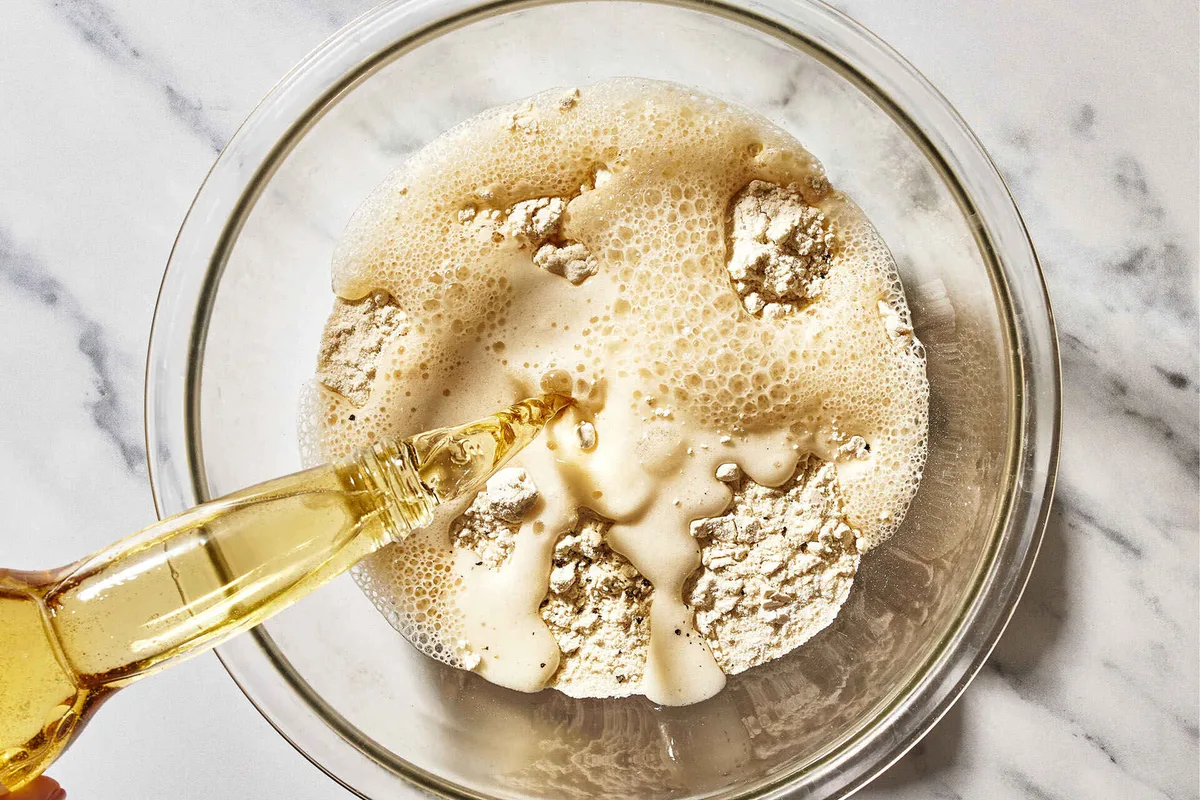
Choice 2: Your Flour Base (All-Purpose, Cornstarch, or Mixes)
The flour provides the structure. All-purpose wheat flour is the standard. It gives a good balance of crispness and sturdiness.
For an extra-crispy, slightly shard-like texture, many cooks replace a portion (about 1/4) of the wheat flour with cornstarch or potato starch. These pure starches gelatinize at a different rate, creating a distinct crunch.
For a gluten-free batter, you'll use a blend like rice flour and tapioca starch. These blends work well but often brown faster, so you need to watch your oil temperature even more closely. The choice here affects not just crispness but also how well the batter adheres and how quickly it colors.
Choice 3: Your Flavor & Leavening (Seasoning, Baking Powder, and Eggs)
This is where you customize. Salt is essential, both in the batter and on the fish itself. Pepper, paprika, or garlic powder are common additions.
Baking powder is a key leavening agent, especially if you're using a non-carbonated liquid. It creates additional gas bubbles as it heats, contributing to a lighter batter.
Eggs are a point of contention. They add richness and help the batter cling, but they can also make it heavier and more cake-like. For the lightest, crispiest pub-style coat, most recipes omit the egg.
For a sturdier, more substantial coating that holds up to hearty sauces, an egg can be a good addition. It's similar to the binding choice you make when creating a cohesive rotisserie chicken salad, where mayonnaise or yogurt changes the texture entirely.
Side-by-Side Comparison: Which Batter Type Is Best For What?
Let's put these choices together into real-world batter profiles. This table shows you the outcome of each path, so you can pick based on what you're cooking and the experience you want.
| Batter Type | Texture & Flavor | Best For… | Biggest Challenge |
|---|---|---|---|
| Classic Pub Beer Batter | Ultra-crispy, shattering, flavorful, deep golden brown. | Thick, firm fillets like cod or haddock. A showstopper for a proper Friday night fish fry. | Can be fussy. The batter must be very cold, and maintaining the exact oil temperature is critical. |
| Sparkling Water Batter (Tempura-Style) | Incredibly light, lacy, delicate crispness. Neutral taste. | Thin white fish fillets or vegetables. When you want a barely-there, elegant coating. | Fragile. Needs immediate frying and gentle handling. Doesn't hold heat as long after cooking. |
| Simple Milk/Water Batter | Tender, pancake-like, even coating. Reliable and forgiving. | Weeknight dinners, thicker fillets. The "never fails" option for consistent results. | Less crisp, can be a bit soft or bready if not fried hot enough. |
| Gluten-Free or Extra-Crispy Batter | Very crisp, sometimes slightly denser or more shard-like crunch. | Dietary needs, or anyone craving maximum audible shatter. | Can brown too fast due to different starch chemistry. Needs precise oil temp monitoring. |
This comparison makes it clear there's no single "best" batter. The beer batter is king for flavor and tradition but demands more attention. The sparkling water batter is the technical choice for ultimate crispness.
The simple milk batter is your dependable friend for a good, easy meal. Your decision should hinge on your main goal for the dish. If you're looking for another universally loved, texture-focused dish, our collection of all recipes has plenty of options that play with similar contrasts.
The Best Fish for Battering (And Which to Avoid)
Not all fish are created equal for frying. You need a fillet that can stand up to the heat without falling apart. It should have a mild flavor and a firm, flaky texture.
The champions are thick, lean, white-fleshed fish. Cod is the undisputed king for a reason. Its large, firm flakes and clean taste are the perfect canvas.
Haddock is a close second, often preferred in the UK for its slightly sweeter note. Halibut and pollock are also excellent, sturdy choices.
Avoid oily fish like salmon or mackerel. Their strong flavors clash with the delicate batter. They also release more moisture during cooking, which can steam the coating from underneath.
Very thin or delicate fillets, like sole, are tricky. They cook so fast the batter barely has time to crisp before the fish is done. For a successful fry, thickness matters.
Aim for 1-inch thick portions for even cooking.
The Non-Negotiable Workflow: Steps for Perfect Batter Every Time
This is your action plan. Follow these steps in order, and you'll bypass the most common pitfalls. It's a sequence built on the principles we've already covered.
Step 1: Prep Your Fish (This is Where Most People Slip Up)
Take your fish out of the fridge 15 minutes before cooking. Pat each fillet completely dry with paper towels. You want the surface bone-dry.
Season both sides generously with salt. This initial seasoning penetrates and seasons the fish itself, not just the coating.
Let the salted fish sit on a rack while you prepare the batter. This further dries the surface. That dry, tacky surface is what the flour will grab onto.
Any visible moisture is your enemy here.
Step 2: Mix Your Batter (Cold is Key)
Combine your dry ingredients in one bowl. Whisk your cold liquid in another. Pour the liquid into the dry ingredients.
Stir just until combined. A few lumps are fine, even good. Over-mixing develops gluten and leads to a tough coating.
Keep the batter cold. If using beer or soda water, have it chilled. You can even rest the bowl in a larger bowl of ice water.
A cold batter hits the hot oil and reacts more vigorously, creating a better puff.
Step 3: Heat and Test Your Oil (The Make-or-Break Moment)
Pour your oil into a heavy pot or deep fryer. You need enough to submerge the fish. Heat it over medium-high heat.
Do not walk away.
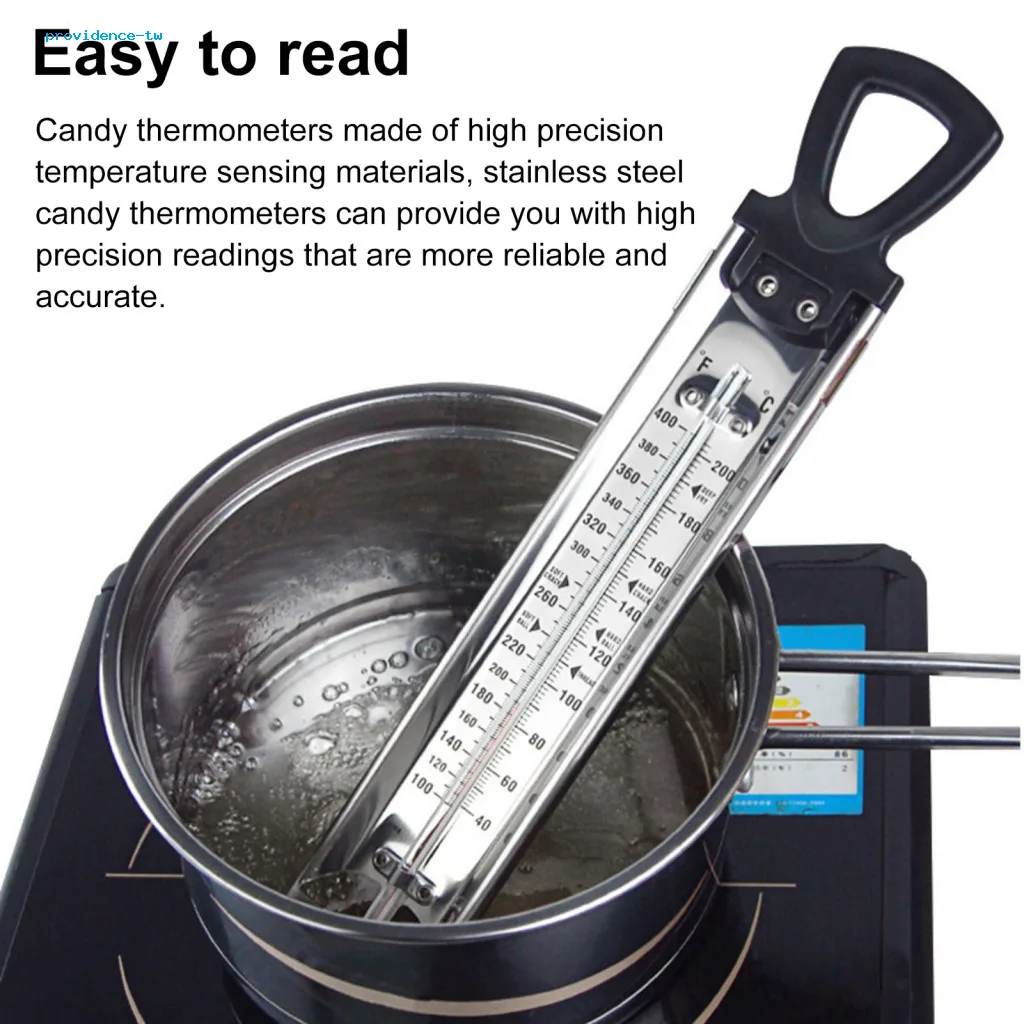
Use a thermometer. This is non-negotiable for consistent results. The target is 350, 375°F.
To test without a thermometer, drop a small cube of bread into the oil. It should turn golden brown in about 60 seconds. If it browns instantly, it's too hot.
If it sinks and soaks, it's too cold.
Step 4: Dredge, Coat, and Fry (The Final Act)
Set up a station: dried fish, a plate of flour, your bowl of batter, and a slotted spoon or spider. Dredge one dry fillet in the flour. Shake off the excess.
This is your glue layer.
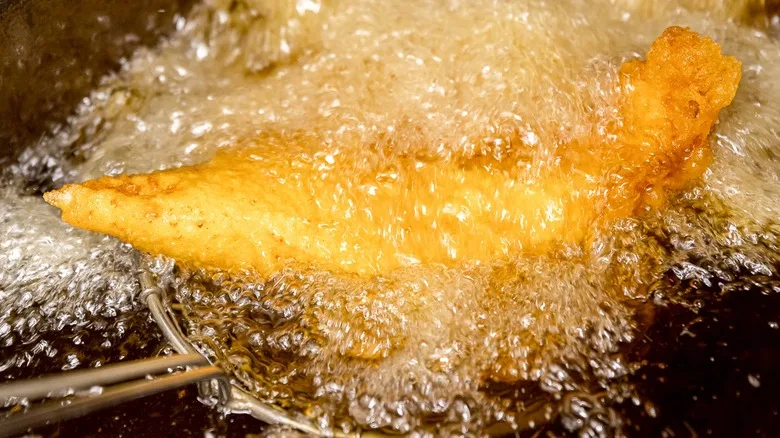
Dip the floured fish into the batter. Let the excess drip off for a second. Gently lower it into the hot oil.
Do not drop it. Do not overcrowd the pot. Adding too much at once crashes the oil temperature.
Fry for 3 to 6 minutes, depending on thickness. The fish should be a deep, even golden brown.
Step 5: Drain and Serve Immediately
Lift the cooked fish out and let the oil drip back into the pot. Place it on a wire rack set over a baking sheet. Do not use paper towels on a plate.
Paper towels trap steam and make the bottom crust soggy. The rack allows air to circulate, keeping the entire crust crisp.
Serve right away. Battered fish is at its absolute peak within minutes of leaving the oil. The contrast between the hot, crisp shell and the tender fish is everything.
Common Batter Blunders and How to Avoid Them
Let's diagnose the specific failures so you can fix them next time. Each one has a clear cause and solution.
Soggy, Oily Coating
This is the number one complaint. The cause is always oil that's too cold. The batter soaks up fat before it can set into a crisp shell.
Fix it by waiting for your oil to reach a verified 350°F before adding the first piece. Don't guess.
Batter Sliding Off the Fish
The bond failed. You likely skipped the flour dredge, or your fish wasn't dry enough. Remember the sequence: dry fish, flour glue, wet batter.
Pat your fish thoroughly and never skip the dredge.
Dark Brown, Bitter Exterior / Raw Inside
Your oil was far too hot. The outside burned before the heat could travel to the center. Let the oil cool down to the correct range.
Consider cutting thicker fillets in half for more even cooking.
Pale, Dense, or Gummy Batter
The opposite problem. The oil was too cool, or you over-mixed the batter. It never got the hot shock it needed to puff and crisp.
It just slowly cooked into a doughy blanket. Check your temperature and mix your batter less.
Uneven Cooking and Greasy Fish
You crowded the pan. Adding too many pieces at once drops the oil temperature dramatically. Fry in small batches.
Let the oil recover its heat between batches. This patience is key for quality.
Pro Advice: The Little Things That Make a Big Difference
Beyond the basic steps, a few expert tweaks can elevate your results from good to great. These are the details that separate a reliable home cook from a fry master.
First, let your batter rest for 15-30 minutes after mixing. This allows the flour to fully hydrate. The result is a smoother, more cohesive batter that fries more evenly.
This is especially helpful for simple water or milk batters.
Second, use a neutral, high-smoke-point oil. Canola, peanut, and vegetable oil are all excellent choices. They can handle the sustained high heat without breaking down or imparting off flavors.
Save your expensive olive oil for other dishes, like a vibrant Greek yogurt chicken salad.
Third, season your batter well. Salt is crucial. A pinch of baking powder in all batters, even carbonated ones, gives an extra lift.
A spoonful of cornstarch mixed into the flour dredge can enhance the final crunch.
Finally, fry your thicker pieces first. If you have a mix of tail-end thin pieces and thick center cuts, start with the thick ones. They need more time.
Adding the thin pieces last prevents them from overcooking while you wait for the thick ones to finish.
Safety First: Handling Hot Oil Without the Drama
Frying is safe if you're careful and prepared. A moment of distraction can lead to a serious burn or a fire. Follow these guidelines to keep everything under control.
Always use a deep, heavy pot. A Dutch oven is ideal. It prevents splashes and maintains a steady temperature.
Never fill the pot more than halfway with oil. When you add the fish, the oil level will rise. You need that headroom to prevent dangerous overflow.
Dry your fish thoroughly. Water causes violent spattering when it hits hot oil. Keep a lid nearby to smother a potential flame, but never cover a pot that's actively spattering.
It can create a dangerous pressure buildup.
Turn the handles of your pots inward on the stove. This prevents them from being knocked over. Keep children and pets out of the kitchen during frying.
Have a box of baking soda or a fire extinguisher rated for grease fires (Class K or B) within easy reach.
When you're done, let the oil cool completely in the pot. Do not move it while hot. Once cool, strain it through a fine mesh sieve into a container for disposal or reuse.
Never pour it down the drain. It will solidify and cause major plumbing issues. For proper disposal methods, consult your local municipal guidelines, often found on official .gov waste management sites.
FAQs: Your Fried Fish Questions, Answered
Here are clear, direct answers to the most common questions we encounter.
Can I make the batter ahead of time?
Yes, but with a caveat. You can mix the dry ingredients ahead. Add the cold liquid only when you're ready to fry.
If you must mix the full batter early, keep it very cold. Even then, a carbonated batter will lose its bubbles over time, resulting in a less crisp texture.
What's the absolute best oil for frying fish?
The best oils are neutral in flavor and have a high smoke point. Canola, peanut, and vegetable (soybean) oils are all top choices as of 2026. They can maintain the 375°F heat without breaking down or smoking excessively.
Can I bake or air fry battered fish instead?
You can try, but the results are different. An oven or air fryer uses hot air, not immersion in hot oil. This makes it very hard to achieve the same shattering crispness.
The batter often cooks more like a soft coating. For a crisp result without deep frying, a panko breading is usually a more reliable alternative.
How do I keep the first batch warm while I finish frying?
Place fried pieces on a wire rack set over a baking sheet. Keep them in a 200°F oven. The rack prevents steam from making the bottom soggy.
Avoid stacking them or wrapping them in foil.
My batter isn't crispy. What did I do wrong?
This almost always points to oil temperature. Your oil was likely too cool. The batter soaked up fat instead of instantly sealing.
Use a thermometer next time and verify it's at 350, 375°F before adding the fish. Crowding the pan can also cause this.
The Final Call: What We Actually Use at Home
After comparing all the methods, here's the straightforward approach we'd recommend for most home cooks. It balances flavor, crispness, and reliability.
For the fish, go with 1-inch thick cod or haddock fillets. Dry them well and season with salt. For the batter, a simple beer batter is hard to beat for flavor and texture.
Use a cold lager. Mix it gently into flour seasoned with salt, pepper, and a teaspoon of baking powder. Let it rest for 15 minutes.
Heat canola oil to 360°F in a Dutch oven. Dredge each dry fillet in flour, then coat in the cold batter. Fry in small batches for 4 to 5 minutes.
Drain on a rack. Serve immediately with lemon wedges and tartar sauce. This method gives you that classic, satisfying pub-style crunch with minimal fuss.
It's the combination that consistently delivers the battered fish experience everyone hopes for.