
Easy Why Is Panko Not Sticking to Chicken
Why is panko not sticking to chicken? Nine times out of ten, it's wet meat, a skipped flour layer, or crumbs that never got pressed. All three have simple fixes, and none of them require changing your recipe.
The good news is that reliable adhesion isn't luck, it's sequence. Cooks call the flour-egg-crumb chain the standard breading procedure, and every layer exists to solve one specific bonding problem. Get the sequence right and the crust holds until the chicken hits 165°F, the USDA's safe minimum for poultry per foodsafety.gov.
Before we fix anything, let's look at how the bond actually works.
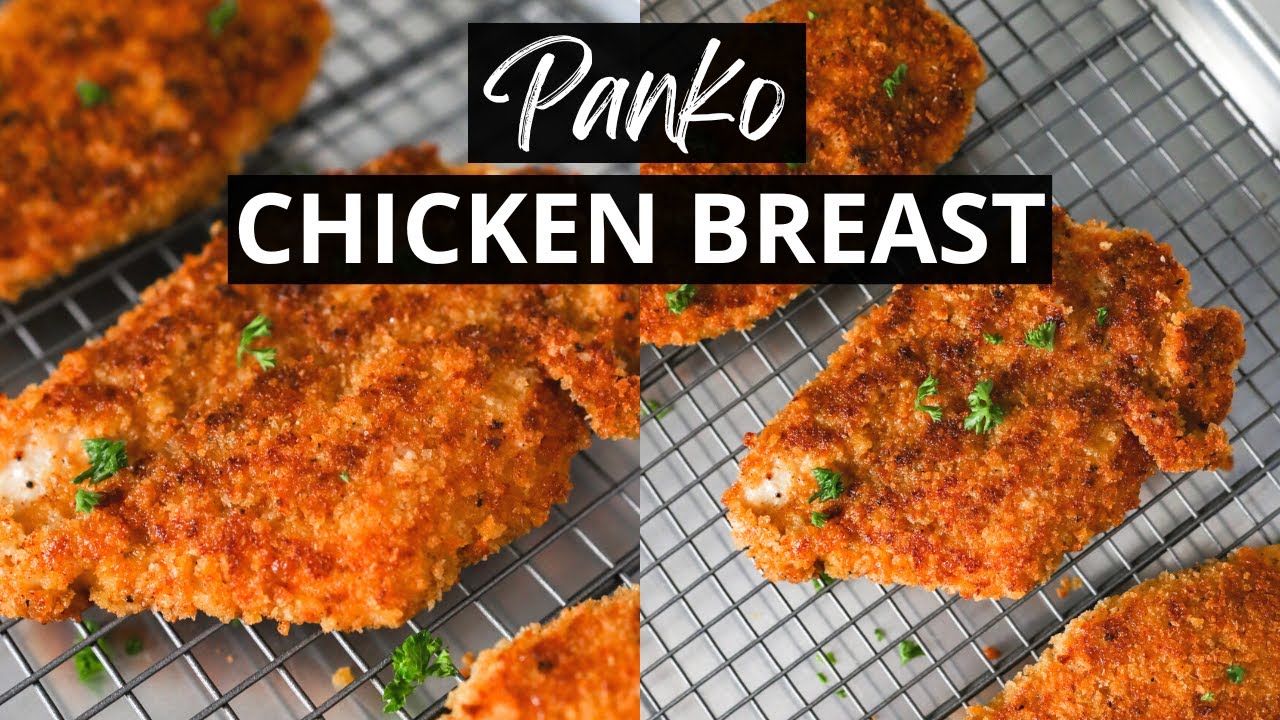
Image source: YouTube / Maple Jubilee (YouTube thumbnail (fair-use with source credit))
Why Is Panko Not Sticking to Chicken? The Quick Answer
Panko won't stick to chicken when the meat's surface is wet. Moisture blocks the bond between chicken, egg wash, and crumbs. Skipping the flour layer removes the grip the egg wash needs.
Unpressed panko flakes sit loose and fall away during cooking. Pat dry, flour, thin egg coat, press firmly, then chill.
How Panko Bonds to Chicken (and Why It Lets Go)
Panko isn't ordinary breadcrumbs. It's made from crustless bread dried into large, flat, shard-like flakes, a Japanese style that anchors dishes like tonkatsu and chicken katsu. Those jagged edges are the whole point.
They catch onto a tacky surface and lock in place, which is what creates that shatter-crisp shell.

Image source: YouTube / BecomeAChef (YouTube thumbnail (fair-use with source credit))
Adhesion is a three-link chain. Flour dries the meat's surface and gives the egg something grippy to hold. The egg wash, beaten eggs sometimes thinned with a splash of water, acts as protein glue that sets firm with heat.
The panko supplies crunch, but only if pressure pushes those flakes into the egg while it's still wet.
Break any link and the chain fails at its weakest point. Water is the usual saboteur, because raw chicken weeps moisture and a wet surface repels egg the way a damp wall repels paint. Timing matters too, since egg proteins need real heat to coagulate and weld the layers together.
| Layer | Job in the bond | Skip it and this happens |
|---|---|---|
| Flour dredge | Absorbs surface moisture, gives egg a dry grip | Egg wash slides on wet meat, coating lifts |
| Egg wash | Protein glue that sets with heat | Crumbs have nothing to anchor to |
| Panko, pressed | Crunch and insulation | No crust, or a loose one that sheds |
One more thing worth knowing: as of 2026, panko is stocked in virtually every mainstream grocery store, and Asian markets often carry bigger, coarser bags for less money.
Find Your Failure Point Before You Fix Anything
Same symptom, different disease. Before you change anything, figure out where in the process the bond breaks, because the fix for wet meat won't help unpressed crumbs. Work through the four scenarios below and find the one that matches what you're seeing.
The Coating Slides Off While You're Breading
If the crumbs won't stay put while the cutlet is still in your hands, the surface is wet or the egg layer is too thick. Blot the chicken again, and thin the wash with a tablespoon of water per two eggs. Switch to the wet-hand, dry-hand method: one hand handles wet steps, the other handles dry, so your fingers stop turning into glue balls.
Bare Patches Show Up After Cooking
Bare spots mean the crumb never covered the surface evenly in the first place. The usual offenders are the thin edges and tapered tip of a breast cutlet, where crumbs sit loosest. Press panko into every edge deliberately, and rotate the cutlet a quarter turn mid-press so no zone gets missed.
The Panko Falls Off in the Oil or Air Fryer
A coating that detaches during cooking points to two suspects: the crust never set, or the oil was too cool. Without a 10-15 minute chill, the egg is still tacky and dissolves before it cooks. Cool oil does the same thing in slow motion.
Hold the pan between 325 and 350°F, and flip each piece only once.
One Side Comes Out Soggy or Greasy
Sogginess on the bottom is a drainage problem, not a breading problem. Paper towels trap steam against the crust, and a crowded pan does the same thing from above. Drain on a wire rack instead, fry in batches, and serve right away, uncovered.
The Breading Workflow That Actually Sticks: Step by Step
Here's the full sequence, start to finish. Set up before the chicken comes out of the package, because breading rewards momentum. Everything you need costs little, and most of it is already in your kitchen.
| Tool | Why it earns its spot |
|---|---|
| Paper towels | Blotting surface moisture, the number-one cause of sliding panko |
| Meat mallet or heavy skillet | Pounds breasts to an even 1/2 inch |
| Three shallow bowls or pie plates | Keeps flour, egg, and crumbs separate and reachable |
| Wire cooling rack | Drains the crust without steaming it soggy |
| Instant-read thermometer | Confirms 165°F inside without guesswork |
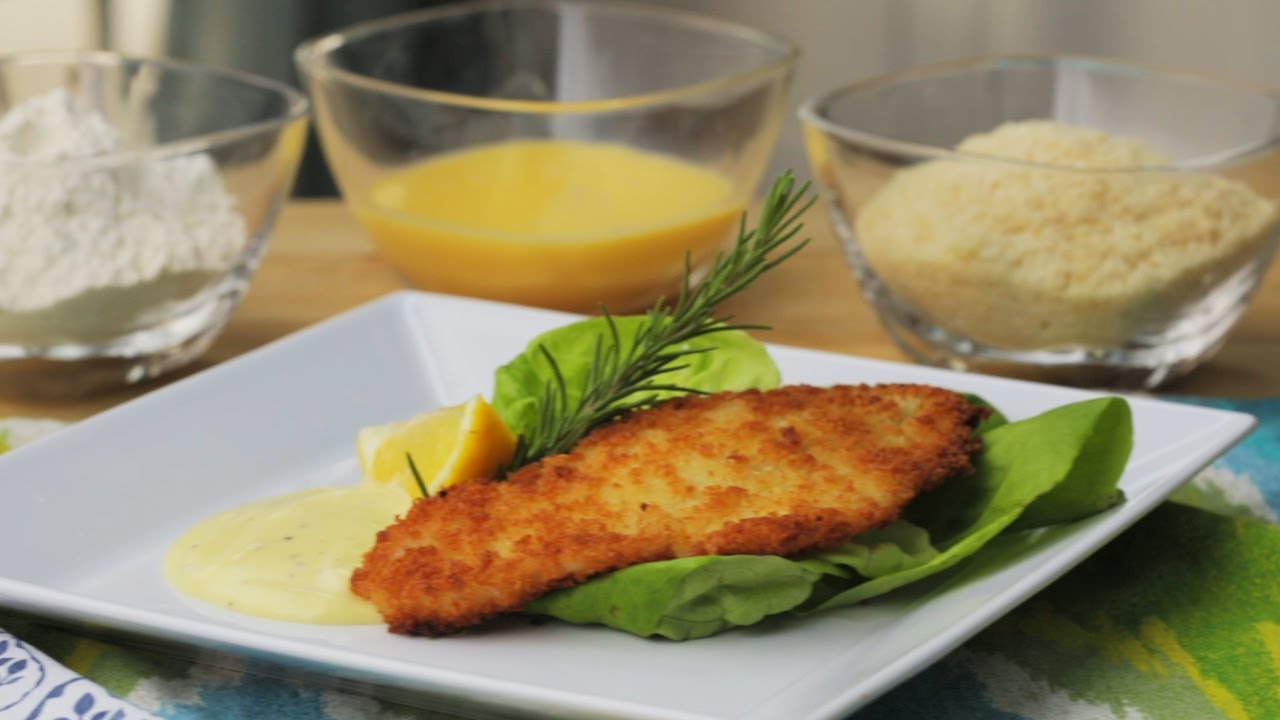
Image source: YouTube / SheKnows How To (YouTube thumbnail (fair-use with source credit))
Pat Dry, Pound Even, Season Every Layer
Start with dry meat, always. Press paper towels against every face until nothing glistens, because surface water undermines every layer that follows. Pound thicker ends to an even half inch so the crust and the interior finish at the same time.
Then season each station: salt in the flour, a pinch in the egg, and more in the crumbs, since no single layer carries enough seasoning alone.
Flour First: The Moisture-Gripping Layer Everyone Skips
The flour dredge looks optional and isn't. It wicks up the last film of moisture and hands the egg a dry, rough surface to bite into. Coat lightly and shake off the excess, because you want a veil, not a paste.
Leftover flour that touched raw chicken goes straight in the trash, per USDA Food Safety and Inspection Service handling guidance.
The Egg Wash Rule: Thin Coat, Not a Bath
Here's the counterintuitive part: more egg makes panko stick worse, not better. A thick wet layer gives the flakes nothing to grip, so they ride on liquid instead of bonding. Beat two eggs with a tablespoon of water, dip, lift, and let the excess drip off for a few seconds.
The chicken should look shiny, not drippy.
Press the Panko Like You Mean It
Lay the cutlet in the crumbs, scoop more over the top, and press with your palm for a solid five seconds. Flip and repeat. You're not dusting, you're embedding, and firm pressure is what pushes those jagged flakes into the wet egg where they lock.
A properly breaded cutlet looks densely coated, with no pink showing through.
Rest and Chill: The 10-Minute Step That Locks the Crust On
This is the step almost everyone skips, and it's the cheapest upgrade in the whole process. Ten to fifteen minutes in the fridge lets the flour hydrate and the egg seep into the crumbs. All three layers weld into one shell.
Chilled coating also firms up, so it survives the flip without smearing.
Once chilled, the coating is stable enough to handle. Hot oil then browns the set flakes through the Maillard reaction, building that deep golden color and toasted flavor.
| When you're cooking | What to do |
|---|---|
| Within the hour | Chill the breaded chicken 10-15 minutes, then cook |
| Tomorrow | Refrigerate uncovered on a rack-lined tray up to 24 hours |
| Later | Freeze solid on a tray, bag them, cook from frozen with a few extra minutes |
Whenever you cook it, pull the chicken at 165°F internal temperature, checked with an instant-read thermometer at the thickest point. That's the safe minimum for poultry, and it's the same number whether you fry, bake, or air fry.
Make-ahead breading is a genuine weeknight superpower. Bread a double batch on Sunday, freeze half, and future-you drops frozen cutlets straight into hot oil on a Wednesday.
Cooking Fixes by Method: Pan-Frying, Oven, and Air Fryer
Heat is the common thread across every cooking method. If the oil or air isn't hot enough, the egg wash dissolves before it sets and drags your panko down with it. Each method just manages that heat a little differently.
Image source: YouTube / Juicy Chicken (YouTube thumbnail (fair-use with source credit))
For shallow pan-frying, pour in a quarter to half inch of neutral oil and bring it to 325 to 350°F. An instant-read thermometer beats guesswork here. Fry cutlets in batches, flip once when the underside turns deep gold, and give each side three to four minutes for a half-inch piece.
Pull them onto a wire rack, never paper towels.
Oven baking trades some crunch for convenience. Set a wire rack on a rimmed baking sheet so hot air moves under the chicken, then bake at 400 to 425°F for 20 to 25 minutes. A light spray or brush of oil on the crust helps it brown evenly.
Flip halfway through.
Air fryers run hotter and faster. Preheat the basket, arrange cutlets in a single uncrowded layer, and cook at 380 to 400°F for 12 to 16 minutes. Flip or shake the basket halfway.
A quick oil spray keeps the flakes from drying out pale.
| Method | Temperature | Time (half-inch cutlet) | Best for |
|---|---|---|---|
| Shallow pan-fry | 325 to 350°F oil | 6 to 8 minutes total | Maximum crunch |
| Oven bake | 400 to 425°F | 20 to 25 minutes | Hands-off batches |
| Air fryer | 380 to 400°F | 12 to 16 minutes | Weeknight speed |
Whichever method you pick, verify 165°F at the thickest point before serving. If the crust browns faster than the interior climbs, drop the temperature 25 degrees and let it run longer.
Mistakes That Undo an Otherwise Perfect Breading
Most failed coatings trace back to a handful of repeat habits. None of them feel wrong in the moment, which is exactly why they survive. Here's what our research into home-cooking troubleshooting keeps surfacing.
Flipping Too Early
Egg needs 60 to 90 seconds against hot fat to coagulate and lock the crumbs. Nudge the cutlet before that and the unset glue smears straight off. Wait for deep gold at the edges, then flip exactly once.
Crowding the Pan
Four cutlets in a ten-inch skillet can drop the oil temperature 50 degrees in seconds. Cool oil steeps instead of sears, and the egg layer quietly dissolves. Two pieces at a time beats four soggy ones every night of the week.
Covering Hot Chicken With Foil
Foil traps steam, and steam softens a crisp crust within minutes. If you need to hold food warm, park it on a wire rack in a 200°F oven instead. Serve uncovered whenever you can.
Frying in Tired Oil
Burnt crumb specks darken the oil and spot every later batch with bitter flecks. Strain between rounds or start fresh after two batches. Oil that's turned dark or smoking has already given up its flavor.
Seasoning Only One Layer
Salt in the panko alone leaves the meat bland, because the crust sits entirely on the outside. Season the flour, the egg, and the crumbs lightly, each one. Three small pinches beat one big handful.
Food Safety While You're Fixing the Problem
Crispy means nothing if the chicken isn't safe, so keep these rules running in the background. Raw poultry and its juices stay away from everything else in your kitchen. Use a dedicated cutting board, and scrub your hands with soap for a full 20 seconds after handling.
A few non-negotiables worth writing down:
- Discard any flour, egg wash, or panko that touched raw chicken. A contaminated dredge can't be saved or strained back into service.
- Wash boards, knives, and bowls with hot soapy water before they touch anything ready-to-eat.
- Cook to an internal temperature of 165°F, checked at the thickest point of the largest piece.
- Refrigerate leftovers within two hours and eat them within three to four days.
- Never fill a pot more than halfway with oil, and never let water meet hot fat. Patting chicken dry prevents violent spatter as well as sliding panko.
Hot oil demands respect beyond the recipe. Keep a lid nearby to smother any flare-up, and never move a pot of hot oil mid-fry. These habits cost nothing and remove the scariest failure modes in home frying.
FAQs About Panko Not Sticking to Chicken
Can I get panko to stick without egg?
Yes. Buttermilk, Dijon mustard, mayonnaise, or Greek yogurt all work as binders. Apply a thin coat, press the crumbs in firmly, and expect slightly less grip than egg provides.
Mustard adds a pleasant tang that suits chicken especially well.
Why does my breading fall off when I flip the chicken?
Two causes cover most cases. Either the egg hadn't fully set yet, or the oil dropped below 325°F. Flip once, only after the underside turns deep golden, and let the oil recover between pieces.
Should I toast panko before breading?
It's optional but genuinely helpful for oven and air fryer cooking. Dry-toasting panko in a skillet for three to four minutes jump-starts browning, since large flakes color slowly in dry heat. Skip it for pan-frying, where the crust browns quickly on its own.
Why is my panko soggy on the bottom?
Steam is usually the culprit, not water. Paper towels hold moisture against the crust, and foil makes it worse. Drain finished chicken on a wire cooling rack and serve immediately, uncovered.
Can I bread chicken the night before?
Yes, up to 24 hours ahead. Lay the cutlets uncovered on a rack-lined tray so circulating air keeps the surface dry. The extended rest actually improves adhesion, because all three layers hydrate and set together.
Does gluten-free panko stick the same way?
The process is identical, and rice-based gluten-free panko performs much like the original. The flakes run slightly more fragile, so press gently rather than aggressively. Watch the color closely, since some brands brown faster than wheat versions.
Symptom-to-Solution Guide: Match Your Problem to the Fix
Everything above condenses into one diagnostic table. Find your symptom, apply the matching fix, and change only one variable at a time so you know what actually worked.
| What you're seeing | Most likely cause | The fix |
|---|---|---|
| Panko slides off while breading | Wet surface or thick egg layer | Blot dry again, thin the wash, let excess drip off |
| Bare patches after cooking | Unpressed crumbs on edges | Press five seconds per side, rotate a quarter turn |
| Coating falls off in the oil | Skipped chill or cool oil | Chill 10 to 15 minutes, hold oil at 325 to 350°F |
| Soggy, greasy underside | Trapped steam | Drain on a wire rack, fry in small batches, serve uncovered |
| Crust burns before chicken cooks | Oil too hot | Drop to 325°F, or finish thick pieces in a 400°F oven |
| Breading turns gluey on your hands | Wet fingers in the dry station | Use one wet hand and one dry hand |
If you only remember three things, make them these. Moisture is the enemy, so blot until nothing glistens. Pressure creates the bond, so press the crumbs like you mean it.
And patience finishes the job, through the chill and a single unhurried flip. Get those right and your panko stays put from bowl to plate.


