
Rustic Why Is My Breading Not Sticking to Chicken
If you're wondering why is my breading not sticking to chicken, the culprit is almost always moisture, a skipped flour layer, or oil that's too cool. Nine times out of ten, one of those three things went wrong before the pan ever got hot. The good news is that every one of them is fixable in about five minutes.
In our research across food science literature and federal safety guidance, the pattern holds: adhesion fails at predictable points, and each failure leaves a signature. The numbers matter too. Frying oil wants to sit near 350°F, chicken needs to reach 165°F internally per USDA standards, and breaded pieces benefit from a 10-to-20-minute rest before heat.
Once you know which step betrayed you, the fix is usually one small change.

Image source: Wikimedia Commons / Andy Li
Why Is My Breading Not Sticking to Chicken? The Quick Answer
Why is my breading not sticking to chicken? Usually the surface was wet, a dredge stage got skipped, or the coating never set. Wet chicken repels flour, and egg alone can't grip bare protein.
Dry the meat, dredge flour-egg-crumb, press firmly, and rest 15 minutes.
How Breading Actually Grips Chicken (and Why Yours Isn't)
Breading isn't glue. It's a chain, and every link depends on friction. Flour is the anchor.
Its rough, dry particles bite into the chicken's surface and give the next layer something to hold onto.
Skip the flour and the whole system collapses. Egg wash slides straight off bare, smooth protein because liquid has nothing to grab. That's why "just dip it in egg and crumbs" fails almost every time.
Heat finishes the job. Around 140°F, the egg's proteins coagulate and lock the layers together. As the oil climbs toward 350°F, the flour's starches undergo gelatinization, which just means the starch granules absorb moisture, swell, and set into a rigid shell.
That set shell is what survives flipping, plating, and the trip to the table.
Moisture breaks the chain at the very first link. A damp surface can't hold dry flour, so nothing downstream sticks either. This is why patting the meat dry with paper towels beats any premium breadcrumb you can buy.
Diagnose Your Failure First: Which One Sounds Like Yours?
Every failed crust leaves a clue. Match your symptom to a branch below, then jump straight to the fix. Don't apply all the advice at once, because the right correction depends on where things broke.
The Coating Never Grips During Dredging
If the flour dusts on but shakes right back off, the surface is wet or oily. Blot the chicken completely dry with paper towels before anything else touches it. If you salted hours ahead, blot again, because salt pulls moisture back to the surface.
And never rinse raw chicken, since that spreads bacteria around your sink according to the USDA Food Safety and Inspection Service.
The Breading Slides Off the Second It Hits the Oil
If the crust detaches in the pan, it never set. Either you skipped the rest time or the oil was too cool to trigger gelatinization. Give breaded pieces 10 to 20 minutes so the coating hydrates and bonds.
Then confirm the oil is near 350°F before anything goes in.
The Crust Tears Away Mid-Fry or When You Flip
If the coating rips off during cooking, you moved it too soon. The crust needs 2 to 3 undisturbed minutes against hot oil to firm up. Flip once, with tongs, after the edges turn golden and look set.
An overcrowded pan makes this worse, because the temperature drop delays the set even longer.
Only the Bottom Goes Soggy, Pale, or Bald
If just the underside fails, steam is the culprit rather than adhesion. Stacking hot pieces on paper towels traps moisture against the crust. Move finished chicken to a wire rack so air circulates underneath.
In the oven, a flat foil-lined tray causes the same problem, so elevate the pieces on a rack instead.
The Dredging Station Setup That Fixes Most Failures
A proper station is three shallow, wide dishes lined up left to right, each wider than the largest piece of chicken. Shallow dishes keep your hands cleaner and coat more evenly than deep bowls. Season every single layer, not just one, because flavor built in stages beats flavor sprinkled on at the end.
| Station | What Goes In | Its Job |
|---|---|---|
| Dish 1 | Seasoned all-purpose flour | Dries the surface and anchors everything |
| Dish 2 | 2 eggs beaten with 1 tablespoon water | Wet glue that grabs the crumbs |
| Dish 3 | Panko or fresh breadcrumbs | The crunchy outer shell |

Image source: YouTube / raine (YouTube thumbnail (fair-use with source credit))
Technique matters as much as the setup. Work one piece at a time and follow these habits:
- One hand for dry, one hand for wet. Your left hand handles flour and crumbs, your right handles egg. This keeps you from building cement on your fingers.
- Shake off excess flour. A thick flour layer turns to paste under the egg, and paste lifts off in sheets later.
- Let excess egg drip for 3 seconds. Swimming egg dilutes the crumb layer and makes it slide.
- Press the crumbs on firmly. We'll cover exactly how in the next section.
Press, Rest, and Set: The Two Steps Almost Everyone Skips
Most home cooks bread gently and fry instantly. Both choices cost you the crust. Fixing them costs you almost nothing.
Step one: press. Cup the crumb-coated piece in your palm and squeeze gently, then flip and repeat. You want crumbs embedded into the egg layer, not balanced on top of it. Loose crumbs blow off in the oil or, in an air fryer, straight into the fan.
Step two: rest. Lay the pieces on a wire rack in a single layer and wait 10 to 20 minutes. During that window, the crumbs hydrate against the egg and bond down, while the surface dries slightly for a cleaner fry. Skip the rest and the coating hydrates in the pan instead, then slips off in soft clumps.
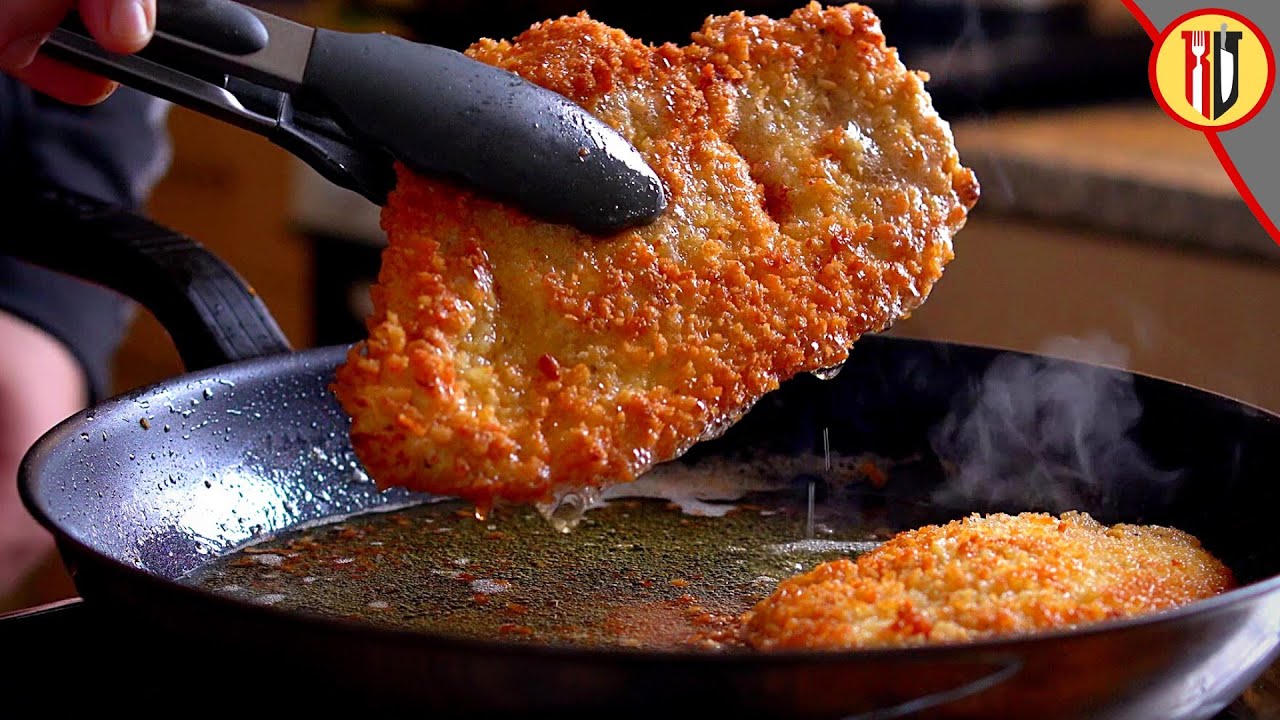
Image source: YouTube / Kitchen Draft (YouTube thumbnail (fair-use with source credit))
Food safety fits comfortably inside this window. Federal guidance, current as of 2026, limits raw poultry to two hours at room temperature, and food safety programs like University of Minnesota Extension echo the same ceiling. A 15-minute rest barely registers.
If your kitchen runs warm or you want a stronger bond, rest the racked pieces in the refrigerator for up to a few hours instead.
Getting the Oil Right: Temperature, Depth, and Batch Size
Oil temperature decides whether your crust sets or slides. Below 325°F, the coating drinks grease before the starches set, then peels away in soft sheets. Push past 375°F and the crumbs burn while the chicken's still raw inside.
Aim for 350°F and hold it there. A clip-on deep-fry thermometer removes all the guesswork. The old tricks work in a pinch: a wooden skewer should bubble steadily at its edges, or a pinch of flour should sizzle hard on contact.
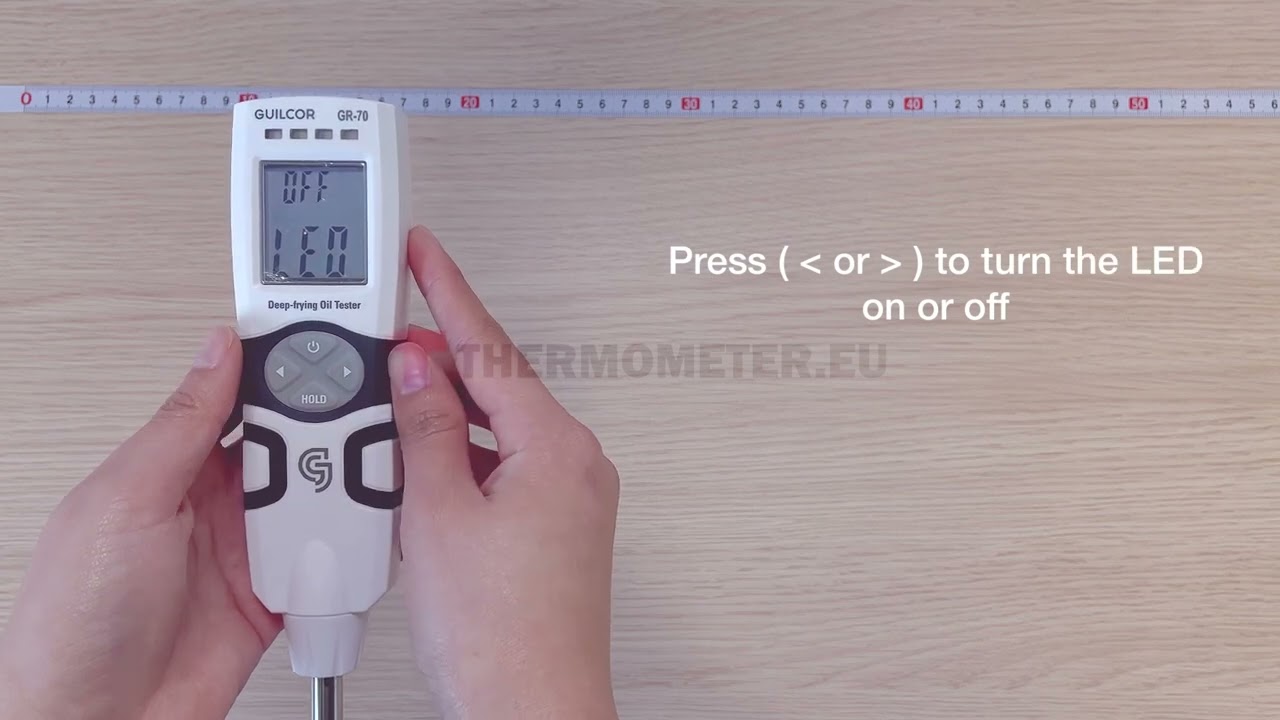
Image source: YouTube / Thermometer EN (YouTube thumbnail (fair-use with source credit))
Depth matters more than people expect. Pan-frying wants 1/4 to 1/2 inch of oil, roughly halfway up the side of the piece. Shallower leaves bald spots on top.
Deeper just wastes oil without helping adhesion.
Batch size is the silent killer. Every cold piece you add drops the oil 20 to 30 degrees. Fry two or three pieces at a time, then let the temperature climb back to 350°F before the next round.
Flip exactly once, after 2 to 3 minutes, when the edges turn golden and the crust looks set.
| Symptom | Likely Cause | Fix |
|---|---|---|
| Greasy crust that slides off | Oil under 325°F | Wait for a true 350°F |
| Dark crust, raw center | Oil over 375°F | Lower the heat, pound cutlets thinner |
| Second batch sticks worse | Temp never recovered | Pause between batches |
Oven-Baked and Air Fryer Fixes for Coatings That Blow Off
Dry-heat cooking gives up the instant set that hot oil provides, so the coating needs help bonding before heat arrives. Two moves fix nearly every baked or air-fried failure: put fat on the crumb layer, and get airflow underneath the chicken.
Skip the flat foil-lined tray in the oven. It steams the underside and hands you a soggy, bald bottom. Set the pieces on a wire rack over a sheet pan instead, brush or spray the coating lightly with oil, and bake at 425°F until the internal temperature reaches 165°F.
Air fryers add a fan to the problem. Loose crumbs don't stick, they fly, straight into the heating element. Press the coating on harder than feels reasonable, mist it with oil, and preheat the basket so the crust starts setting on contact.
| Method | Temp | Non-Negotiable Move |
|---|---|---|
| Oven | 425°F | Wire rack plus oil brush or spray |
| Air fryer | 380-400°F | Firm press, oil mist, preheated basket |
If the coating still blows off in the air fryer, the layer is probably too thick. One thin, well-pressed coat beats a double dredge every time in moving air.
Mistakes to Avoid: Small Habits That Quietly Ruin Adhesion
Most failed crusts trace back to tiny habits, not big technique gaps. These six cause the most damage in home kitchens.
Salting Hours Ahead Without Re-Drying
Salt pulls moisture back to the surface through osmosis. If you salted or brined early, blot the chicken dry again right before the flour stage. A wet surface kills the crust before you start.
Working From Deep Bowls
Deep bowls hide the chicken, coat unevenly, and cake egg-flour cement onto your fingers. Three shallow dishes give you control and clean hands.
Letting Excess Build Up Between Stages
Unshaken flour turns to paste under the egg. Undrained egg waters down the crumbs. Shake and drip between every stage, every piece.
Reusing Clumped Station Dishes
Once egg drips into the flour and forms wet nodules, that dish spreads lumps instead of a fine dust. Refresh the flour partway through big batches.
Flipping Too Soon or Too Often
The crust needs 2 to 3 undisturbed minutes against hot oil to set. Flip once, with tongs, after the edges go golden. Every extra flip tears the coating loose.
Stacking Finished Pieces
Weight presses crumbs off, and trapped steam softens whatever survives. Single layer on a wire rack, always, from rest to drain to hold.
Choosing Your Coating: Flour vs Cornstarch vs Panko vs Crushed Crackers
Which coating sticks best? Honestly, all of them stick fine when the base layers are right. They differ at the edges, in crunch, color, and how much oil they drink.
| Coating | Best For | Behavior |
|---|---|---|
| All-purpose flour | Classic cutlets, schnitzel | Reliable anchor, moderate crunch |
| Wondra flour | Thin, even coats | Disperses fine without clumping |
| Cornstarch | Maximum crisp, gluten-free | Crispest bite, paler browning |
| Panko | Loud crunch, katsu-style | Big airy flakes, needs firm pressing |
| Fine breadcrumbs | Even golden shell | Grips easily, gentler crunch |
| Crushed crackers or cornflakes | Flavor-first crusts | Irregular pieces, press thoroughly |
Cornstarch deserves a closer look. Its pure starch sets into a glassy, crackling shell, but it browns less because there's barely any protein left for the Maillard reaction. Plenty of cooks split the difference with a 50/50 flour-and-cornstarch dredge.
Panko wins on crunch and loses on grease, absorbing noticeably less oil than fine crumbs thanks to its open flake structure. The tradeoff is adhesion. Those large flakes only stay put if you press them in firmly and give them the full rest to hydrate.
Quick picks by goal: katsu calls for panko, schnitzel and Milanese want fine fresh breadcrumbs, gluten-free cooks do best with a cornstarch or rice flour base, and busy weeknights run fine on seasoned flour alone.
Making Breaded Chicken Ahead Without Losing the Crust
Can you bread chicken ahead of time? Yes, and done right, it actually improves adhesion. An uncovered rest in the fridge dries the surface slightly, so the crust grips even harder at cook time.
For same-day or next-day cooking, lay the breaded pieces on a wire rack in a single layer, uncovered, in the refrigerator. A few hours is ideal. Overnight works, though very long rests can leave the coating slightly gummy as moisture migrates outward.
Freezing takes two steps. Freeze the pieces flat on a sheet pan until solid, about 1 to 2 hours, then move them into a freezer bag. Stored this way they hold quality for 1 to 2 months.
Cook them straight from frozen instead of thawing, because thawing condensation re-wets the crust you worked to dry. Add roughly 5 minutes of cook time and confirm 165°F at the thickest point.
Two rules hold everywhere. Never stack breaded pieces, and never seal them tightly while raw. Weight knocks crumbs off, and trapped humidity softens everything else.
Raw Chicken and Hot Oil Safety Basics
Two hazards share this recipe, and neither forgives carelessness. Raw poultry carries bacteria that spread easily, and hot oil burns skin faster than you'd believe. Both risks shrink to nearly zero with a few fixed habits.
- Never rinse raw chicken. Rinsing splashes bacteria across your sink and counters. Patting dry with paper towels achieves the same goal safely.
- Separate your tools. Use one cutting board and set of utensils for raw poultry only, and scrub hands with soap for 20 seconds after dredging.
- Cook to 165°F. Check the thickest point with an instant-read thermometer, not by color alone.
- Keep water away from hot oil. A wet utensil or damp chicken flashes to steam instantly and spatters scalding oil. Keep a lid within reach to smother any flare-up.
- Limit oil reuse. Strain cooled oil through a fine mesh sieve and store it sealed. Toss it after two or three uses, or sooner if it darkens or smells off.
None of this slows you down once it's habit. It just means the only thing you throw away is the paper towel roll's worth of mess, not a whole evening to food poisoning.
FAQs About Breading That Won't Stick
Can I skip the flour and just use egg and breadcrumbs?
No. Egg has nothing to grip on bare protein, so the crumbs slide right off. Flour dries the surface and gives the egg layer an anchor.
Out of flour? Cornstarch works the same way.
Why does my breading stick to the pan instead of the chicken?
The crust hadn't set when you moved the piece, or the oil was too cool. Wait for a true 350°F and leave each piece undisturbed for 2 to 3 minutes. A heavy cast iron skillet also releases cleaner than a scratched nonstick pan.
How do I stop breading from blowing off in the air fryer?
Press the coating on firmly, mist it with oil, and preheat the basket. Loose crumbs fly in moving air, so the bond has to be mechanical. Skip the double dredge too, because thick coats lift off easiest.
Can I use milk or buttermilk instead of egg wash?
Yes, but expect a lighter bond. Milk lacks the concentrated coagulating proteins that make egg such strong glue. For Southern-style fried chicken, dip in buttermilk, then press hard into seasoned flour for a craggy crust that holds anyway.
Why is my breading soggy after cooking?
Trapped steam, not weak adhesion. Paper towels and stacked pieces seal moisture against the crust. Cool everything in a single layer on a wire rack, and re-crisp leftovers in a 400°F oven or air fryer instead of the microwave.
The 60-Second Troubleshooting Chart
Everything above, compressed into one lookup. Find the row that matches what went wrong, apply the single fix, and cook again. Adhesion problems feel mysterious until you see them laid out side by side.
| What You See | What Went Wrong | Do This Next |
|---|---|---|
| Flour won't cling at all | Wet surface | Blot dry with paper towels, re-dredge |
| Crumbs slide off in the oil | Skipped rest or cool oil | Rest 15 minutes, hold oil at 350°F |
| Coating tears when you flip | Moved it too soon | Flip once, after 2 to 3 minutes |
| Bald, pale bottom | Steam trapped underneath | Drain on a wire rack, never stacked |
| Greasy, heavy crust | Oil under 325°F | Hold 350°F, fry smaller batches |
| Dark crust, raw center | Oil over 375°F or piece too thick | Lower heat, pound cutlets even |
| Crumbs blow off while air frying | Loose coat, cold basket | Press hard, mist with oil, preheat |
| Soggy after storing | Stacked or sealed warm | Single layer, uncovered, on a rack |
One fix per attempt. Change three things at once and you'll never know which one worked.


